GLOBALWANDERSLUT
  • Home
  • About
  • Contact

Global Wanderslut

From lusting after to reveling within the wander: 
collecting cities & countries, not men

Matcha Milk Bao

5/20/2020

1 Comment

 
So, I've bee baking since about mid-March 2020.  Yep, I'm a covid19 bandwagon baker.  In my defense, I love exploring new worlds and immersing myself in them.  It started with baking the simple things I was already familiar with, perfecting them my tastes.  COOKIES.  What really caught my attention, though, was bread.  I love the chemistry.

Then I started to have cravings while sitting in Shelter in Place (lockdown): Chinese bakery baos.  So, I've been tweaking my milk bread about 1x per week until I felt comfortable experimenting with it.  What this newbie baker learned was that there are base doughs that can be used for many types of breads.  Milk bread is one of them.  I use a basic form of this for this recipe (with the addition of condensed milk) and for my garlic/chive pull away bread (without much sugar in it, just enough for the yeast to make it the level of fluff I want it to be).  But, it can easily be a base for cinnamon buns, bolo (pineapple) baos, char siu baos, etc. 
Picture
Glam shot of the match swirls.
​Milk bread is great since the dough is super easy to work with. Since I'm a n00b, this recipe was put together with references!  The real bakers that gave me the tools and inspiration to put together their recipes to make this Matcha Milk Bread are included in the description (and their YouTube videos are linked here).  Makes six large baos about 100g each (but I'd actually do 8 smaller ones next time).
Joshua Weissman - he's hilarious, clear in his communication, and the (authentic) recipes turn out great. It's in alignment with at least 5 other recipes, just much better presented. He's the closest to the base dough for my recipe with a few adjustments (video included Greatest Dinner Roll) :

Tangzhong roux:
2 tablespoons bread flour
2 tablespoons water
4 tablespoons milk

Bread Dough:
2+ cups bread flour
1 tablespoon active dry yeast (instant works)
1/2 teaspoon fine sea salt
1/2 cup milk (I sometimes even use oatmilk/water for the base)
2-3 tablespoons condensed milk
1 tablespoon granulated sugar (or skip)
3 tablespoons unsalted butter, softened/melted
1 whole egg, room temperature

Egg wash: one egg 2 tbsp of milk/water) whisked

Matcha butter:
8 tablespoons salted butter (or add a pinch of salt)
1 tablespoon granulated sugar
​2 teaspoon matcha powder
4 tbsp brown sugar (optional but kinda not)
PHASE ONE: base dough
​I'm used to proofing my yeast, just in case, and because I'm a n00b.  So I'd start with that, 1/2 cup of milk (warmed to about 110f, no more than 115f) mixed with 2-3 tbsp of condensed milk, sugar (if using) and the 1 tbsp of yeast.  If you're using water or oatmilk, I'd suggest going with 3 tbsp of the condensed milk to balance out the fat you want to soften the rolls.

Weissman does a great job of showing how to put together the tangzhong, but I found you can also zap it in the microwave 5 seconds at a time stirring each time to get to the right consistency (yah, slightly fewer dishes to wash!).  If you want to do it proper, follow his video.  It should look like a cross between cottage cheese and thick pudding.  Set aside.

​Melt the butter, about 30 seconds high in the microwave, maybe a bit less. Set it aside so that it's cooled by the time you're ready for it.

​Mix all the remaining bread dough ingredients together in a large bowl, add the tangzhong, and mix until it comes together.  

Picture
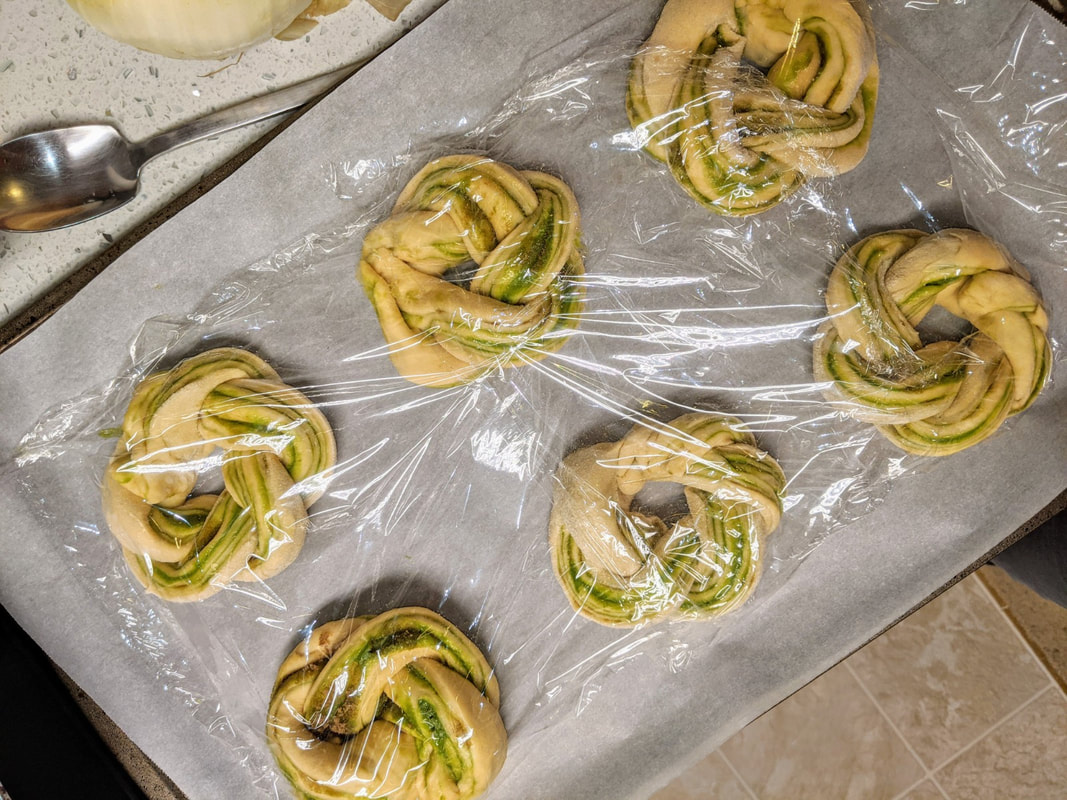
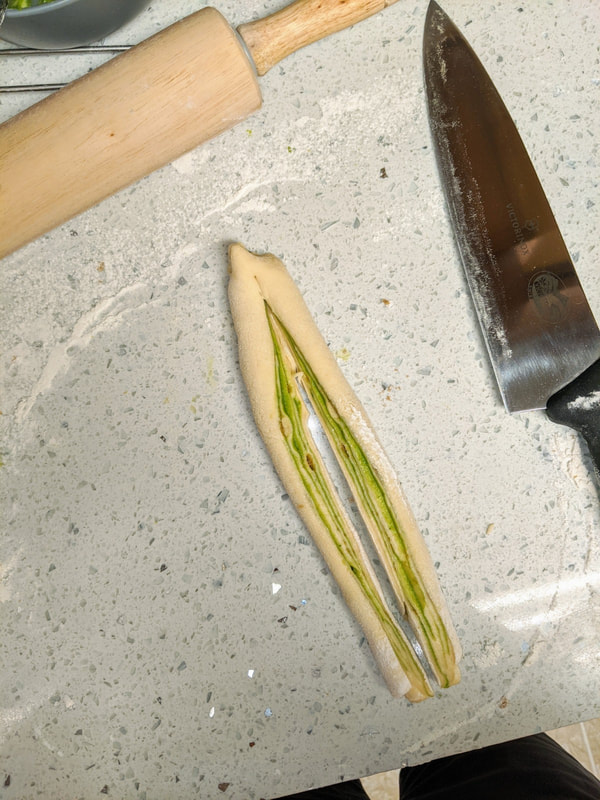
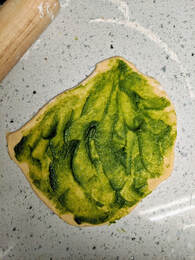
Then, similar to what Weissman does, add the butter after it comes together (his is softened, I just full on melt mine since that's easier when kneading it by hand) and continue to mix, and then knead on floured surface for 10 minutes (ok to add more flour as you go if it's too sticky, but don't do it too much since you don't want the dough dried out).  It will transform from pretty darn sticky to just a bit tacky like playdough from the yellow plastic can.  I set a timer and legit space out.  Alternatively, if you have a mixer, follow how Weissman does it in the video, you lucky person, you. 

Place into lightly oiled bowl and cover airtight or with a damp towel - rise until about doubled about 1-2 hours, here in SF, 1 hour and 20 minutes has been a sweet spot (of patience, convenience, and size of dough). 

Preheat to 392f (that's 200c from another recipe that I used and then continued to use this temp because it worked).  
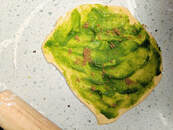

Picture
PHASE 2: matcha butter
​While you're waiting for the rise, make the matcha butter.  It's super easy.  You can either have the butter softened and just mix everything but the brown sugar together by hand, or throw it in the food processor like I do.  Matcha doesn't need to be sifted, yay.  Reserve brown sugar for sprinkling (see photo).


PHASE 3: shaping the dough
When the dough is ready, deflate it and pour it onto lightly floured surface and cut into 6 (about 100g each) or 8 equal pieces. Ideally you roll/flatten them into rectangles, but as you can see from my photo, it doesn't have to be perfect at this stage to have a nice end product - pretty forgiving!  The instructions  are easiest via the 7 nifty tricks video (starts at around 2:02).

​
Keep both the unshaped dough and the shaped dough covered as you work.  Place shaped dough onto parchment paper lined baking sheet.  They grow a lot, so space them out (similar sized to 85c buns).  Rest the shaped dough, covered (I use saran wrap) for another 30 minutes or so; they'll poof up a bit during this time.  

Egg wash - do this right before they go into the oven.  Depending on how shiny I want them, I'm pretty generous about this step (sometimes go over them 2x).
Picture
Picture
This is part of the shaping process. You roll them as you would a cinnamon roll, then slice them down the middle and twist them together. Then, connect the ends so they create the ring.

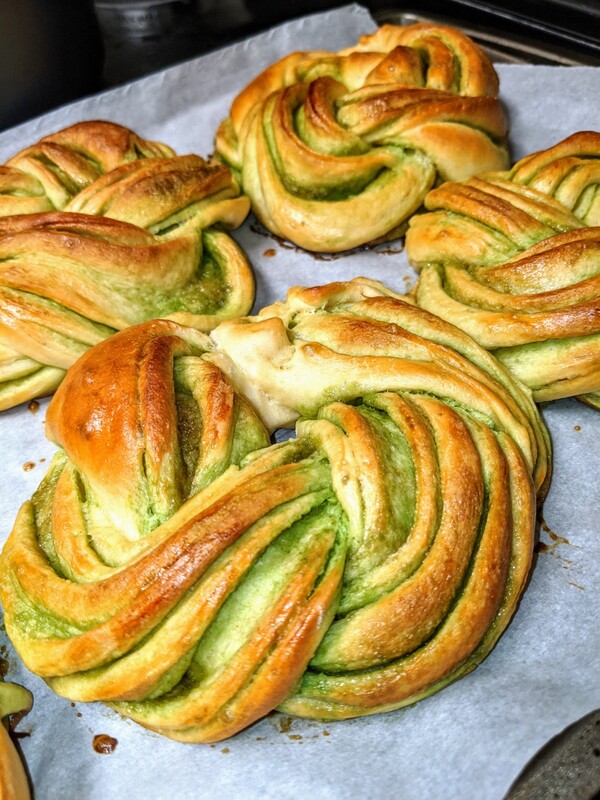
Bake for about 18-20 minutes in the already preheated oven.

Let them cool a bit, but they're legit best warm & fresh.  If saving them for another day, refresh with a microwave steam: cover bao with damp towel and microwave 15-25 seconds or so on high. 
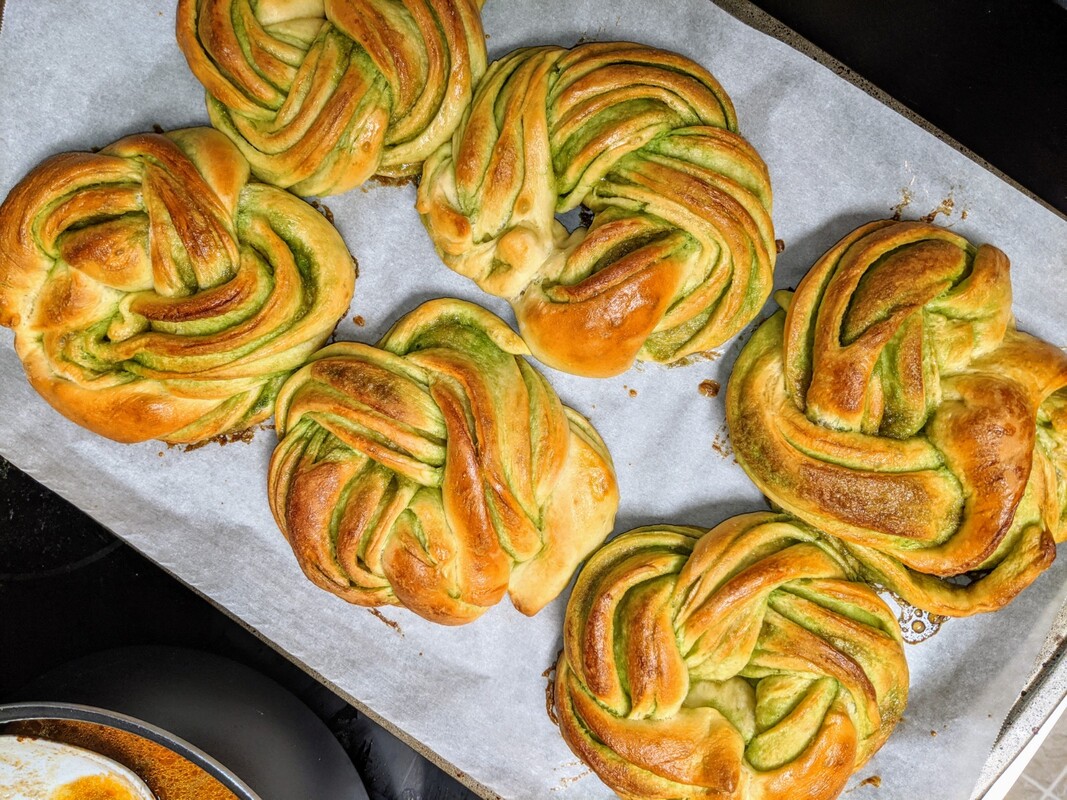
Picture
1 Comment
Travelingchus link
6/11/2020 03:22:52 pm

Thanks for writing this up! Welcome to the baking world and it seems like you've been baking your years!!

Reply

Your comment will be posted after it is approved.


Leave a Reply.

    Author

    Quit my non-profit career in a fit of YOLO rage. Blessed enough to go from wanderlust to wanderslut.  Collecting cities & countries, not men.

    ​​Inspiration for GlobalWanderslut from here.

    Picture
    On instagram: ​GlobalWanderSlut (for bite sized, most up-to-date travel tips from my adventures)
    Picture

    Archives

    May 2020
    March 2019
    April 2017
    March 2017
    February 2017
    January 2017
    November 2016
    October 2016
    January 2015

    Categories

    All
    Baking
    Bangkok
    Belgium
    Brussels
    California
    Domestic
    Europe
    Hawaii
    Kauai
    Los Angelas
    Railay Beach
    Thailand

    RSS Feed

From lusting after to reveling within the wander: 
collecting cities & countries, not men.
GlobalWanderSlut Copyright © 2016
  • Home
  • About
  • Contact