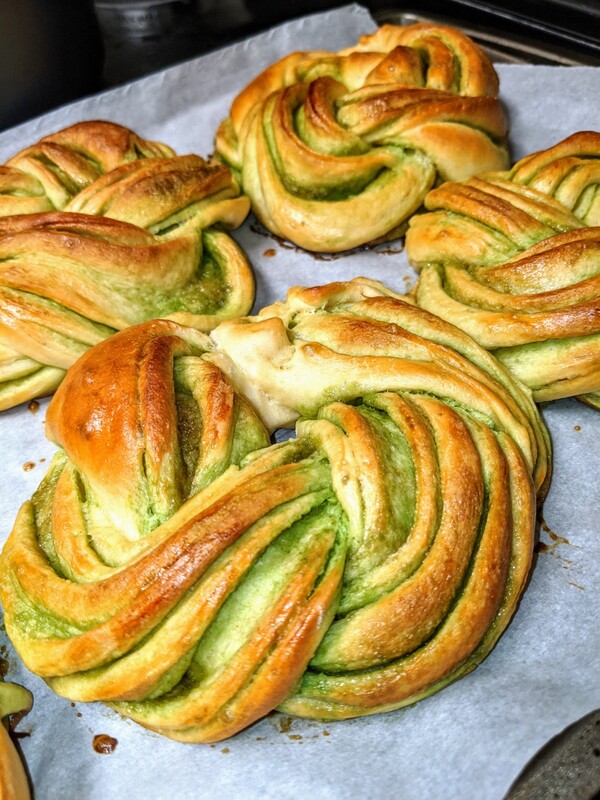
Milk bread is great since the dough is super easy to work with. Since I'm a n00b, this recipe was put together with references! The real bakers that gave me the tools and inspiration to put together their recipes to make this Matcha Milk Bread are included in the description (and their YouTube videos are linked here). Makes six large baos about 100g each (but I'd actually do 8 smaller ones next time).
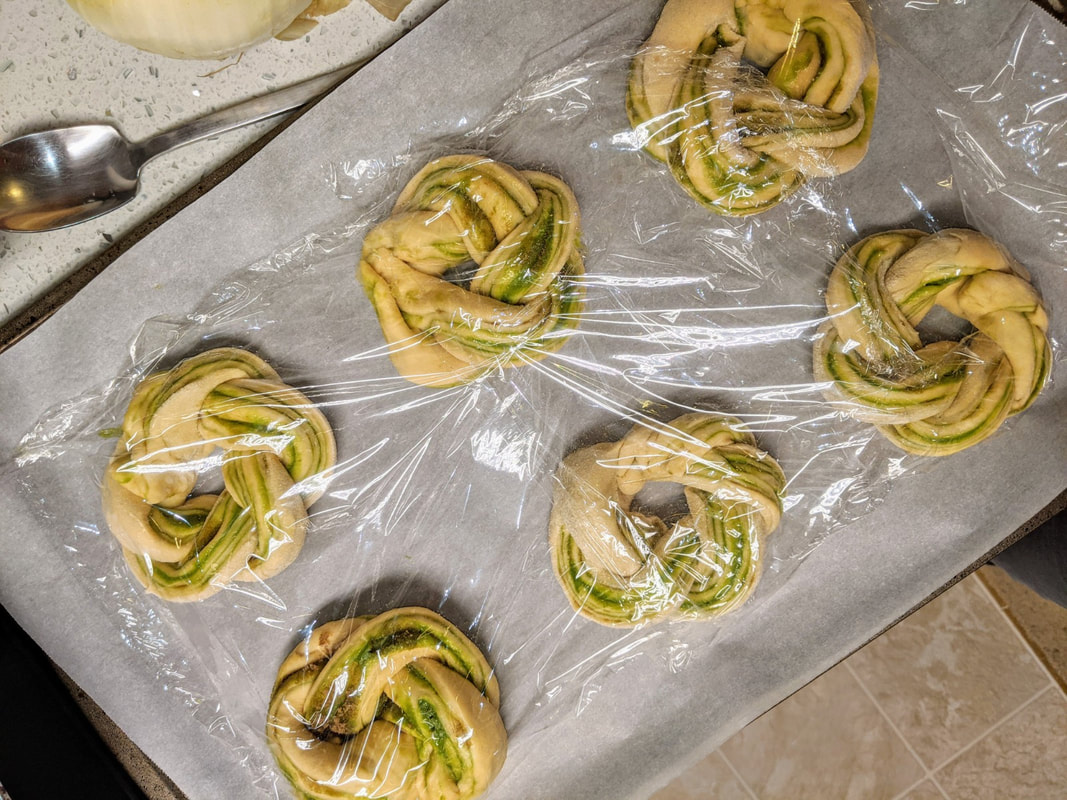
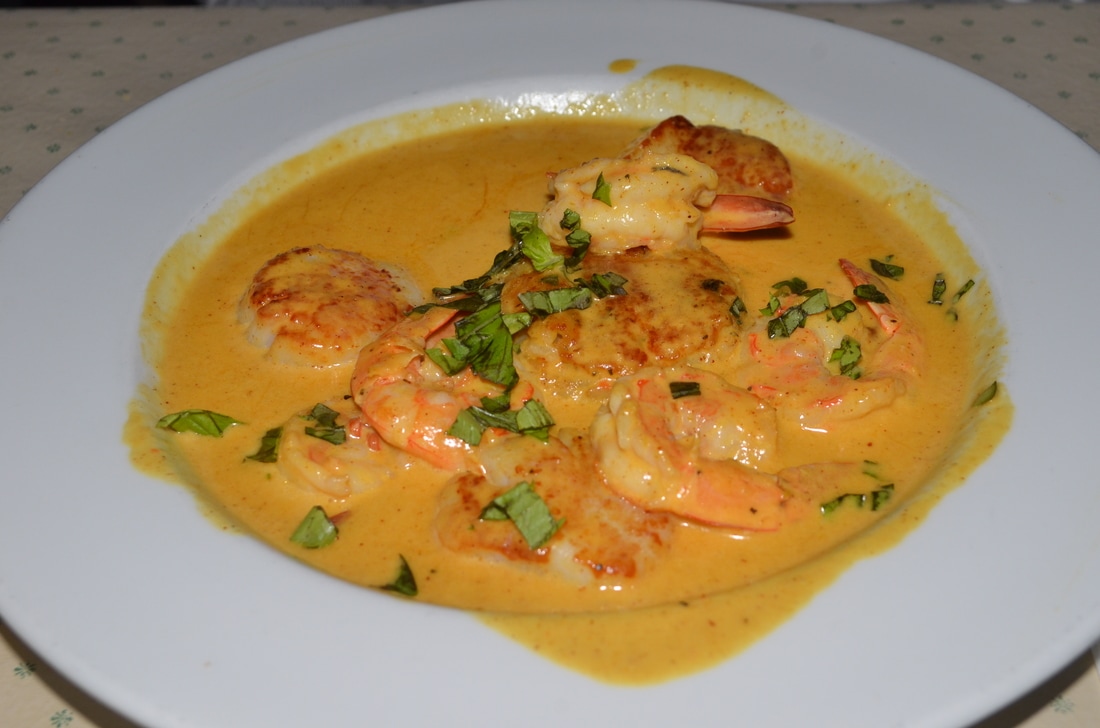
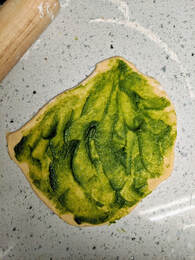 Then, similar to what Weissman does, add the butter after it comes together (his is softened, I just full on melt mine since that's easier when kneading it by hand) and continue to mix, and then knead on floured surface for 10 minutes (ok to add more flour as you go if it's too sticky, but don't do it too much since you don't want the dough dried out). It will transform from pretty darn sticky to just a bit tacky like playdough from the yellow plastic can. I set a timer and legit space out. Alternatively, if you have a mixer, follow how Weissman does it in the video, you lucky person, you. Place into lightly oiled bowl and cover airtight or with a damp towel - rise until about doubled about 1-2 hours, here in SF, 1 hour and 20 minutes has been a sweet spot (of patience, convenience, and size of dough). Preheat to 392f (that's 200c from another recipe that I used and then continued to use this temp because it worked). 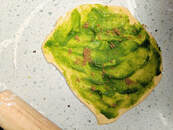 PHASE 2: matcha butter While you're waiting for the rise, make the matcha butter. It's super easy. You can either have the butter softened and just mix everything but the brown sugar together by hand, or throw it in the food processor like I do. Matcha doesn't need to be sifted, yay. Reserve brown sugar for sprinkling (see photo).
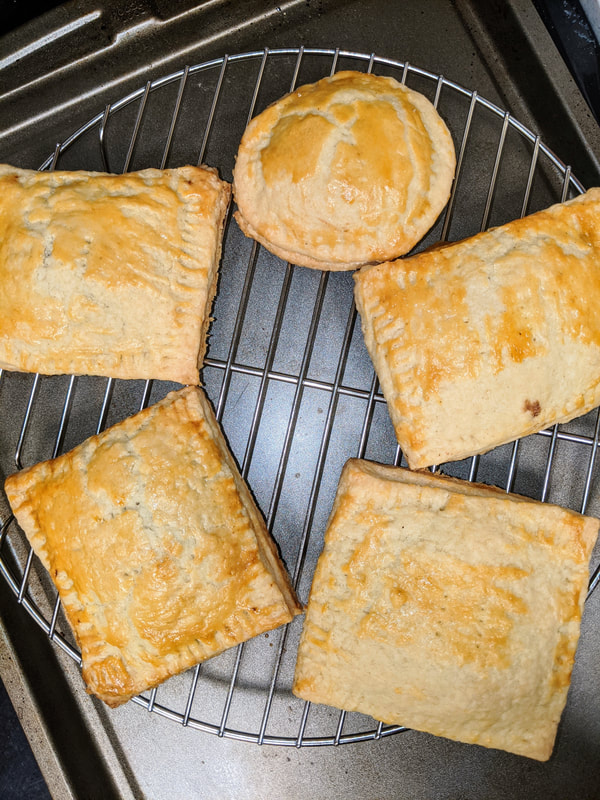
Bake for about 18-20 minutes in the already preheated oven. Let them cool a bit, but they're legit best warm & fresh. If saving them for another day, refresh with a microwave steam: cover bao with damp towel and microwave 15-25 seconds or so on high. 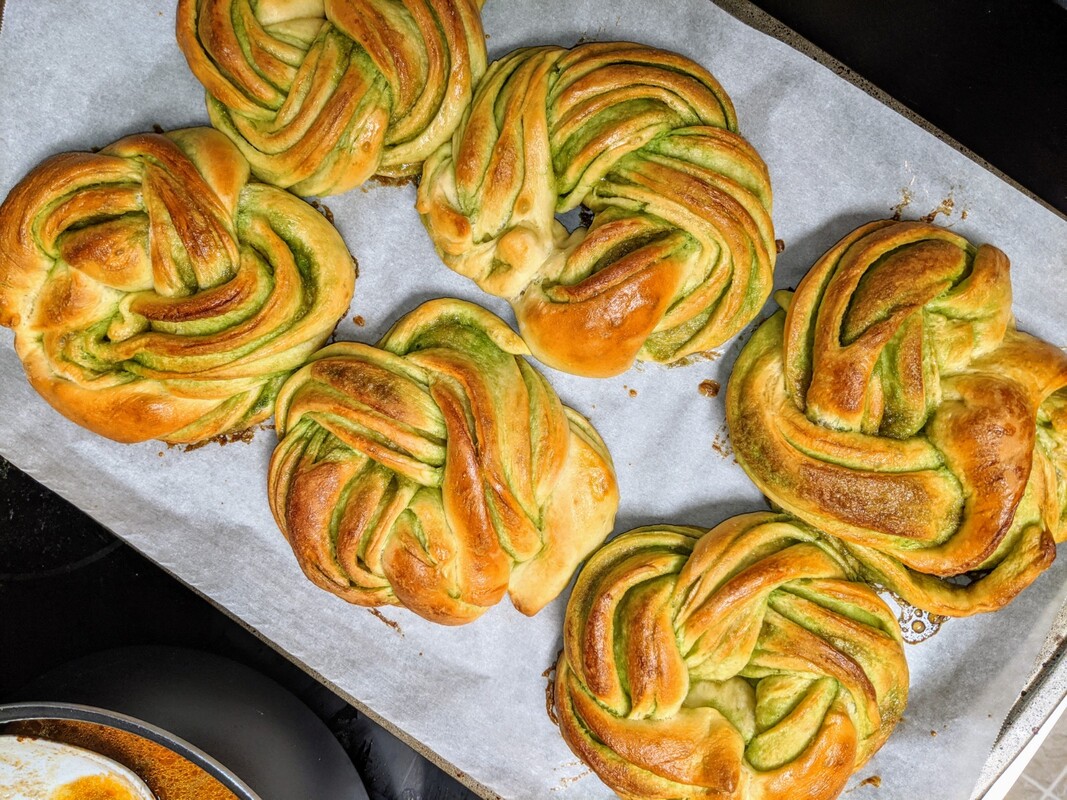
1 Comment
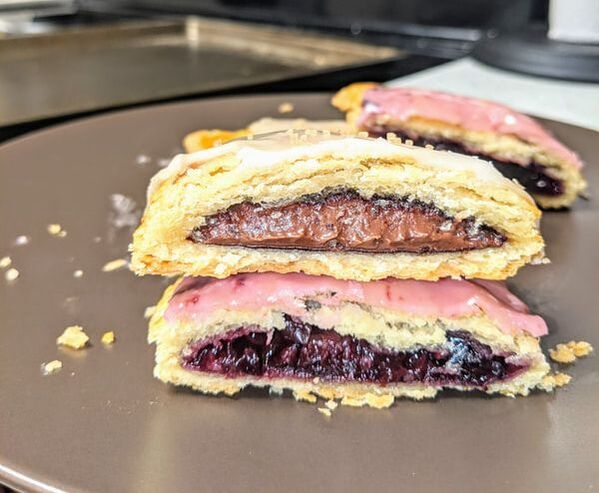
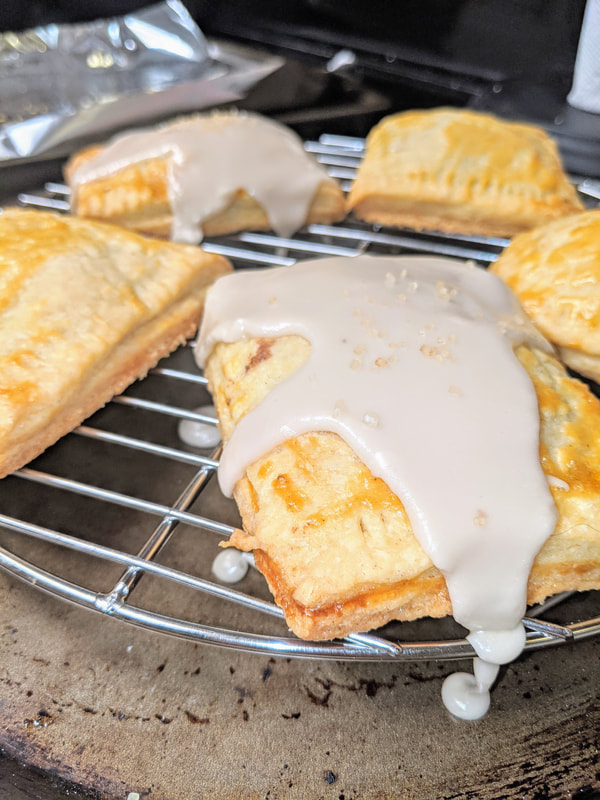
Most recipes call for 3 cups of flour - and that's to make both the top and bottom of a pie. Since...1) I don't have that many people to feed and 2) sugar intake responsibilities as an adult, I cut it in half and that made about 4.5 poptarts (why waste dough?).  Pie Dough 1.25 cups of all purpose flour 1 tbsp granulated sugar 9 tbsp cold butter, cut up into small pieces 1/2 teaspoon salt Up to 3 tbsp of ice cold water (I just put an ice cube in a cup of filtered water and took what I needed from it) Filling Nutella (or equivalent, about 1-2 tablespoons per tart) 1 cup frozen berries and cherries mix (for 2 tarts) 1-4 teaspoons granulated or brown sugar to taste 1 tablespoon cornstarch (more as needed to thicken) Splash of lemon juice (optional) Icing 1 cup powdered/confectioner's sugar 1 tsp maple syrup 1-3 tsp water/milk 1-3 frozen cherries, heated, blended or mashed For the process, I used Joshua Weissman's video. I found several others for directions and such, but his by far looked the best. I incorporated a few steps from the other recipes, though. PHASE 1: pie crust Have all ingredients ready! Most websites state to work pie dough swiftly so that the butter doesn't melt into the dough (ideal for maximum flakiness/yumminess). Put flour, sugar, salt in food processor, pulse a few times to get it all mixed. I have the smaller version of a food processor, and it all fit (though, making double might be tough). Then add the chunks of butter, but put them all around, not just on one side of the food processor. Pulse that a few times until it looks almost sandy with chunks. Then start adding the water, 1 tablespoon at a time while pulsing it in between. Stop when you get pea sized pieces. That's when you (take out the blade) and start to mush it together with your hands. If it comes together, pour it out onto a workspace and gather into a disk (check Weissman's video for what this should look like). Wrap in plastic wrap and put into the fridge to chill 30 mins minimum. PHASE 2: filling prep I actually took my jam filling idea straight from Weissman, but since we're in lock down, only had frozen fruits. It worked really well still! Mix all the ingredients under the filling section (except Nutella!) and over low to medium, heat it up and get it pretty thick so that it's easy to put into the filling. Add a bit more cornstarch if it isn't quite thick enough. You don't want it runny! Also, you could alternatively use pre-made jam (as Weissman suggests). For full Disney effect, I used a hazelnut chocolate pre-made spread for half of the poptarts. Preheat the oven to 375f.
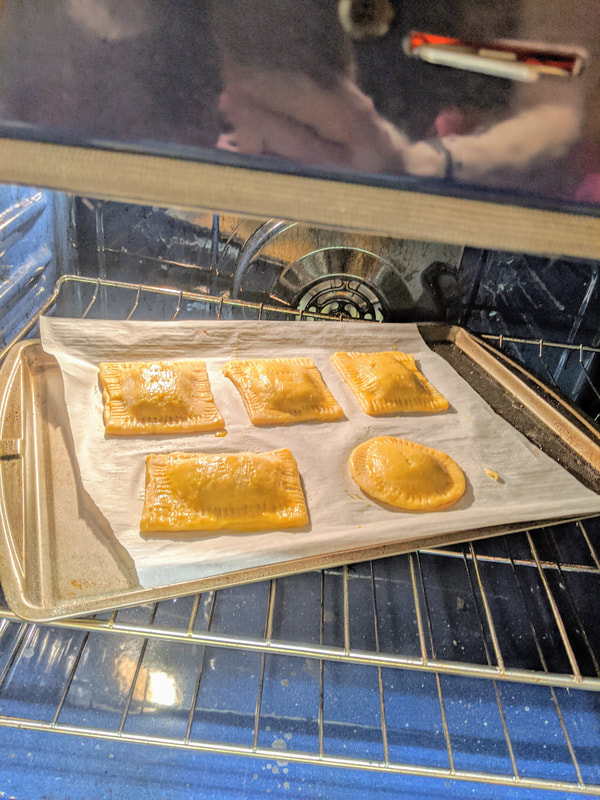
PHASE 5: bake Place your shaped dough into the freezer or fridge for 10-15 minutes to chill that dough again. Then stick them into the oven for 27 minutes at 375f.
Take crust out of fridge, rest at room temp 10 to 15 mins before rolling
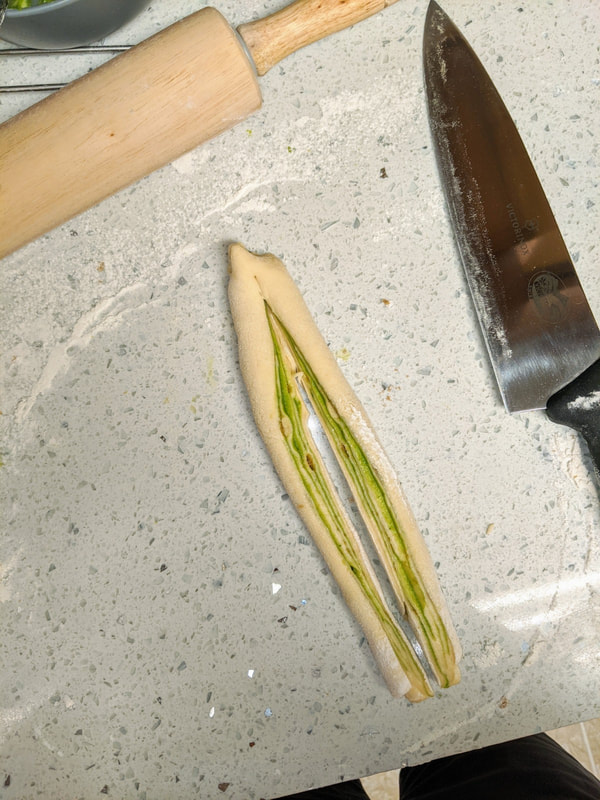
Lightly flour workspace and dough, 9x12 rectangle rolled out 1/8 inch (as thin as possible!), make sure doesn't stick 3 inches wide each, 4 long strips for dough Egg wash (egg and some milk) Prep to fold each strip, 1 tbsp of jam, leave quarter of an inch on each side Seal on edges, try to get out airpockets, and press fork pattern (do this tight!) Freezer 10 mins, 375f, egg wash, oven for 27 mins Glaze ideas 1 cups powdered sugar, add water 1 tsp at a time (or use some other liquid flavor), cool fully before icing (keep as thick as possible)
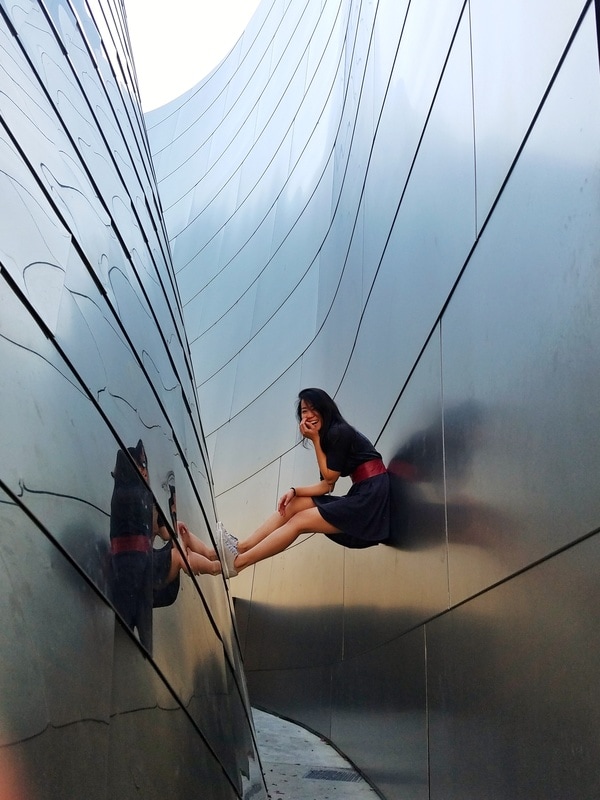
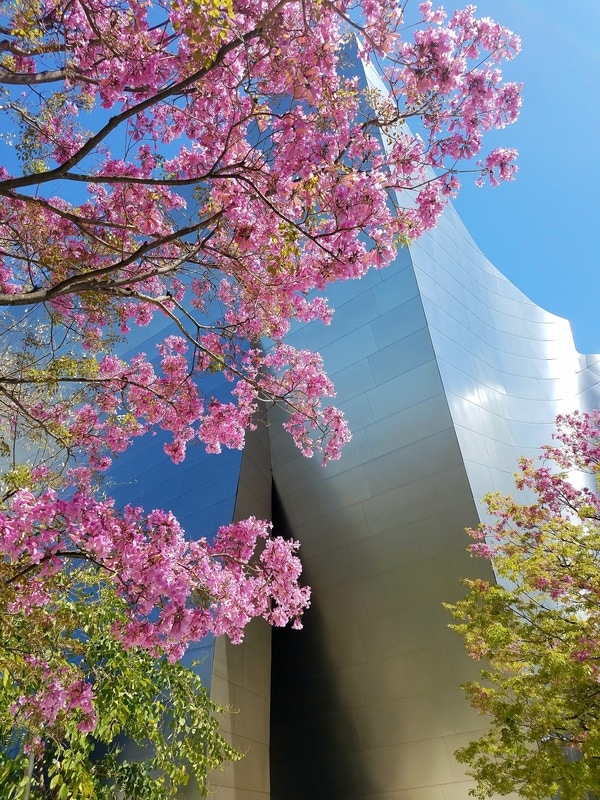
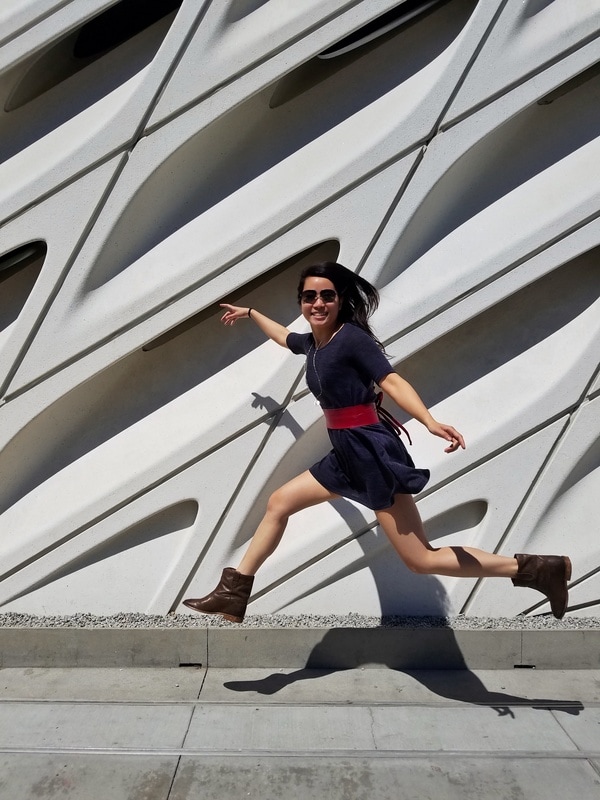
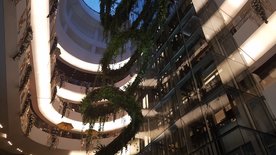
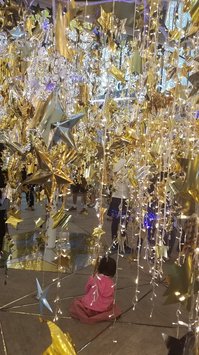
I had so much fun here! We got tickets online the month prior (worth not waiting in line), but didn't get into the infinity room (but, we weren't too worried about that since I'm here so often - next time!). We dropped by the Walt Disney Concert Hall before hand (right across the street) to visit their rooftop gardens and it was beautiful.
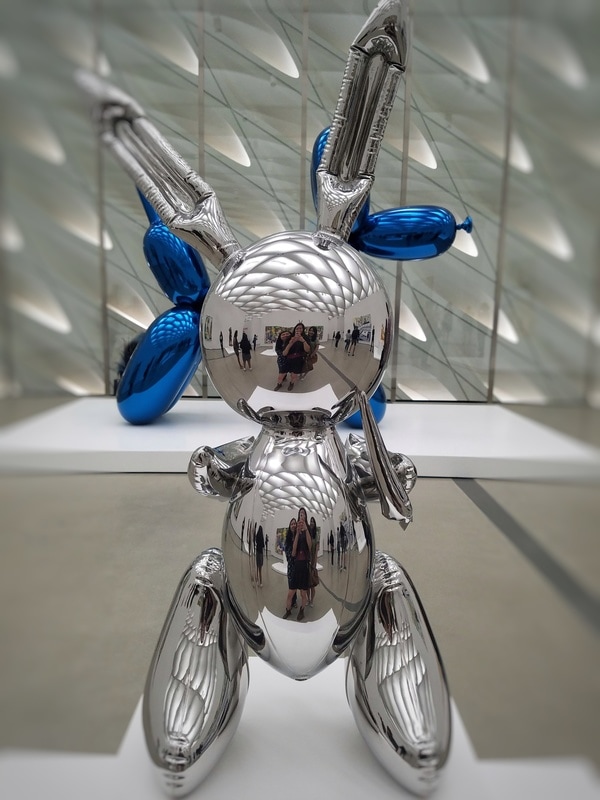
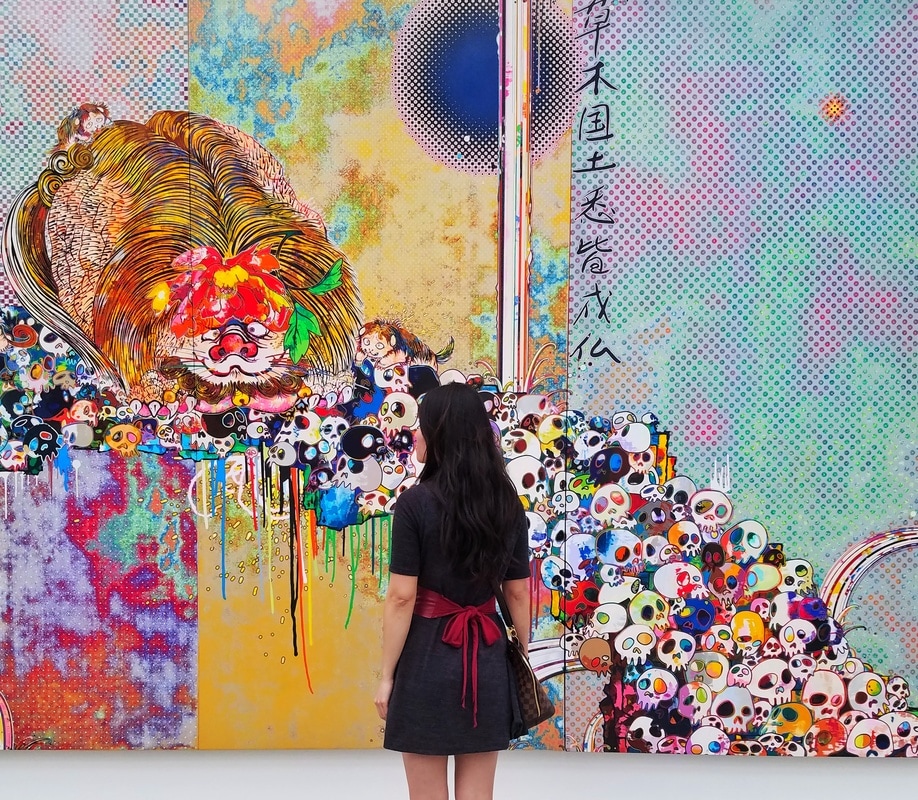
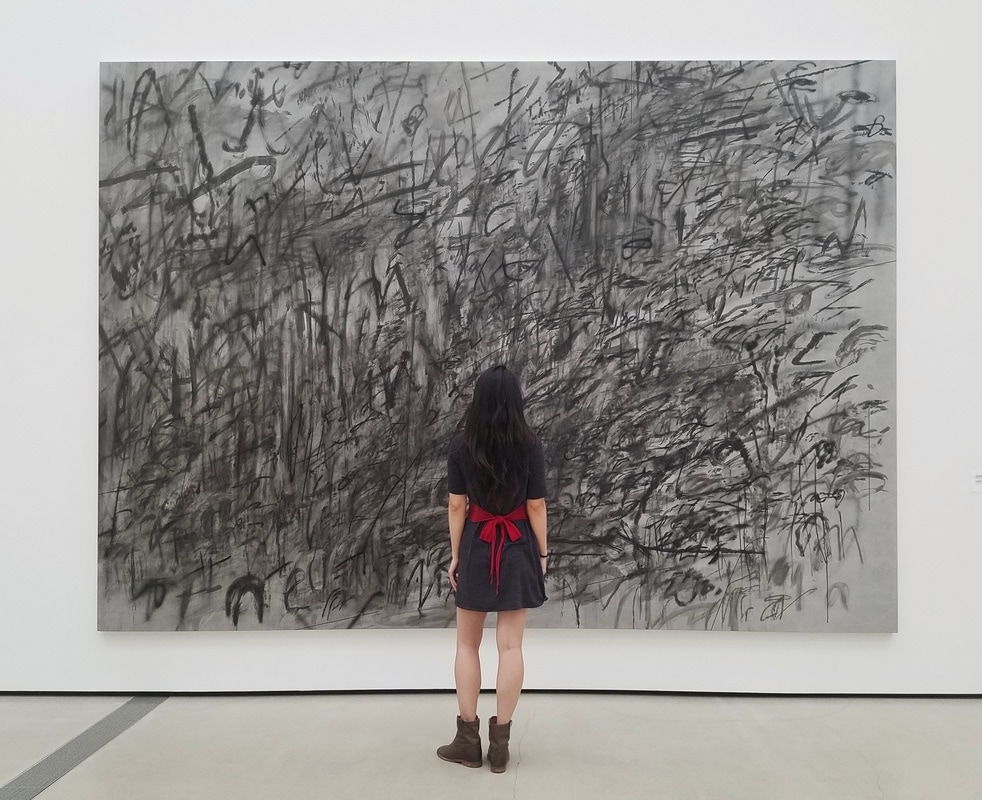
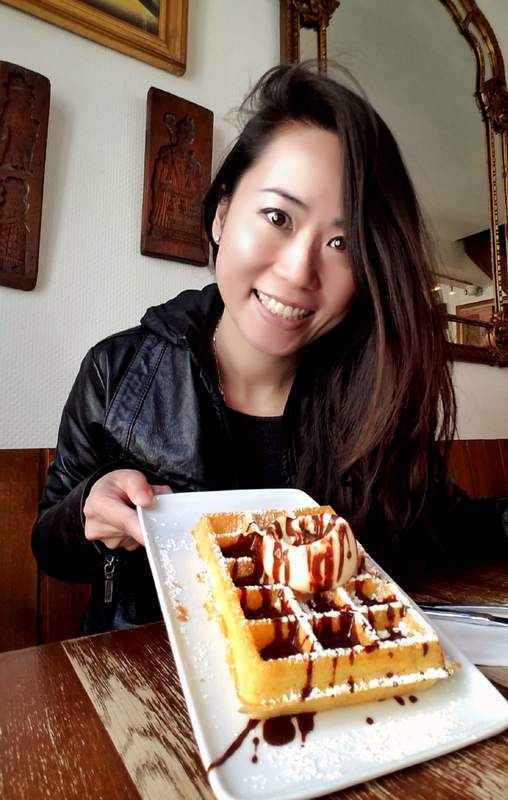
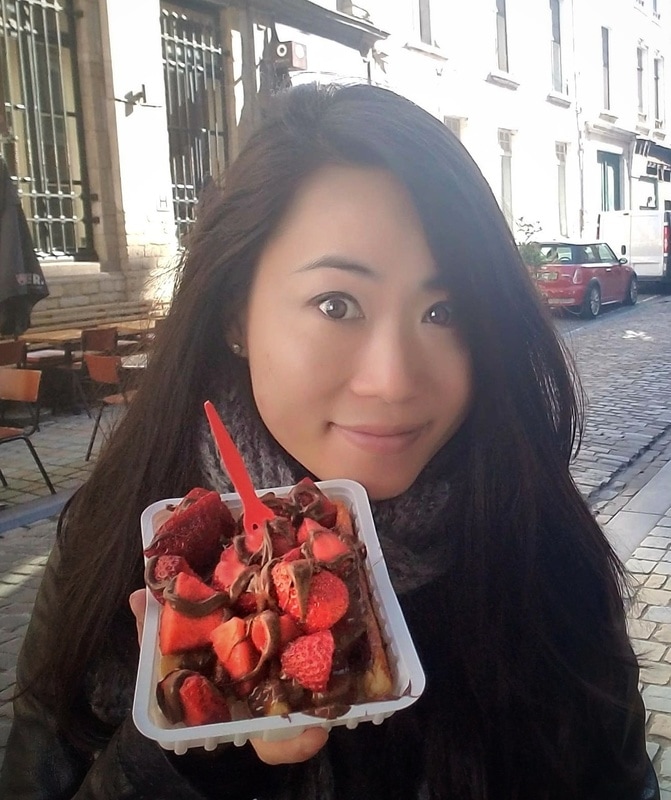
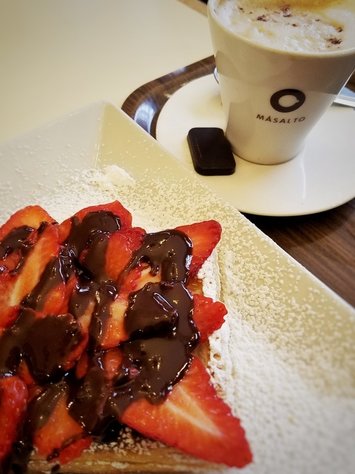
Above: upstairs in the garden area, there is one spot near a doorway in which is very instagrammable. And of course, we were lucky enough to get rain this year, so the beautiful flowers upstairs were in bloom! Below: gallery from our time at The Broad early April 2017 - the exhibits seem to change quite often and the first floor was actually being updated while we were there. So, it seems that this might be a regular stop for me as long as I can get tickets ahead of time! There are two major different types of waffles found in Belgium - Liege and Brussels. The Liege is the one that is rough around the edges - it's chewy and you can sometimes taste bits of sugar still in the batter. This is more unique to use in the US. The Brussels waffle is still quite different than the ones we find here (even if a brunch spot dubs it Belgian) - it's light and airy. I'd say what we find here in the US is a mix of the two in terms of texture.
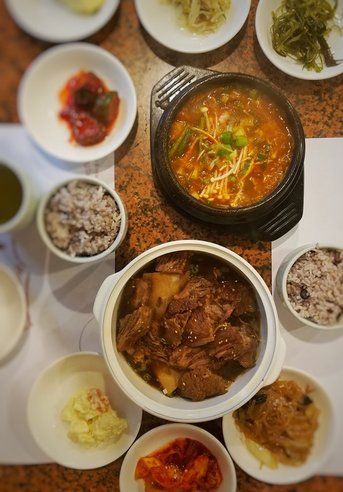
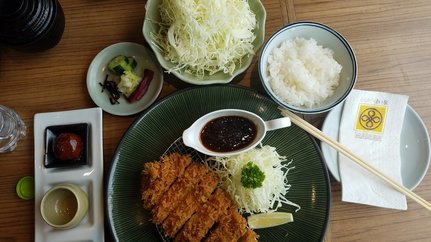
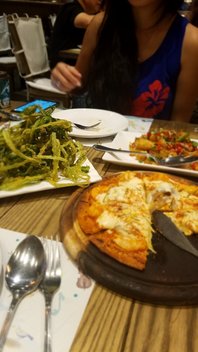
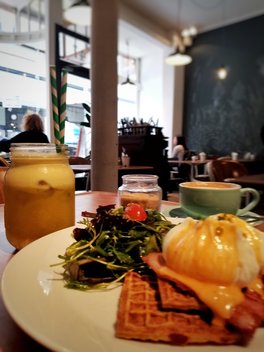 Peck 47 was a great brunch spot that didn't do either Liege or Brussels waffles. But, it must be mentioned since it was my favorite spot for coffee or a snack. They have fresh juices and some delicious, savory waffles like the one pictured to the right (I think it was cheese, leek, and probably bacon flavored). It has great ambiance, but gets packed for breakfast and lunch, so come early or be prepared to wait. Solid coffee to start my mornings. Right near the Boarse. www.yelp.com/biz/peck-47-bruxelles Seongbukdong for Galbi jjim
SomiSomi for dessert!
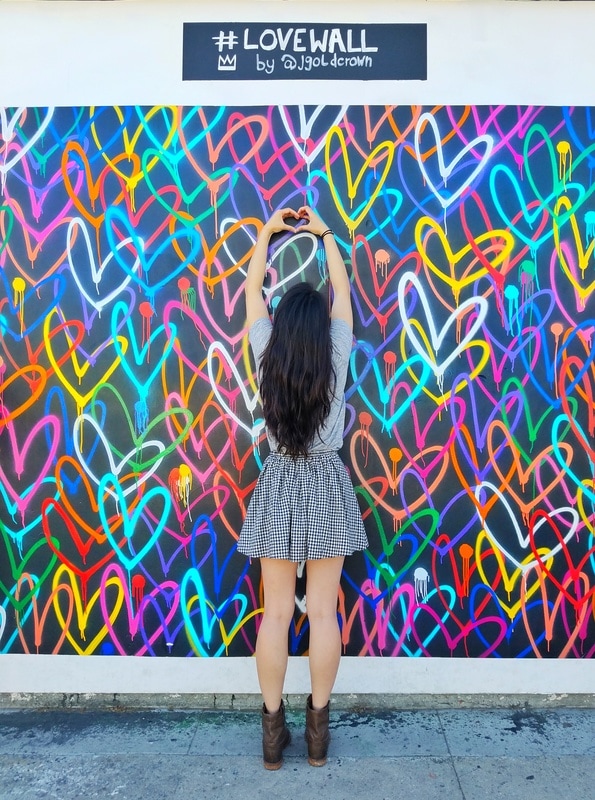
I've been heading to LA every month or so lately since the sister lives down there now! It's nice because it's not an awful drive and I get to bring my pup, Cleo. Los Angelas isn't know for "walkability," which I love when I'm exploring places, so often we're driving around from spot to spot - 10 minutes to ice cream, another 15 to dinner, etc. But, Abbot Kinney in Venice Beach is totally walkable! It's not too far from the beach boardwalk and there are fun shops, beautiful street art down alleyways, and places to snack. Murals - Urban ArtAlthough most of the shops and restaurants are right along the main street, the best artwork is tucked into the alleyways. Sometimes larger than life and easily seen by strolling the several blocks of Abbott Kinney, many are unseen, making for a good excuse to get more steps in, right? Palm Trees & So far "so good" artwork: between Rag & Bone and Kit Ace Love wall: Santa Clara Ave on Greenleaf Chop House Noms nearby Two reasons that I'd used to go to Portland quite a bit are now right on Abbot Kinney!
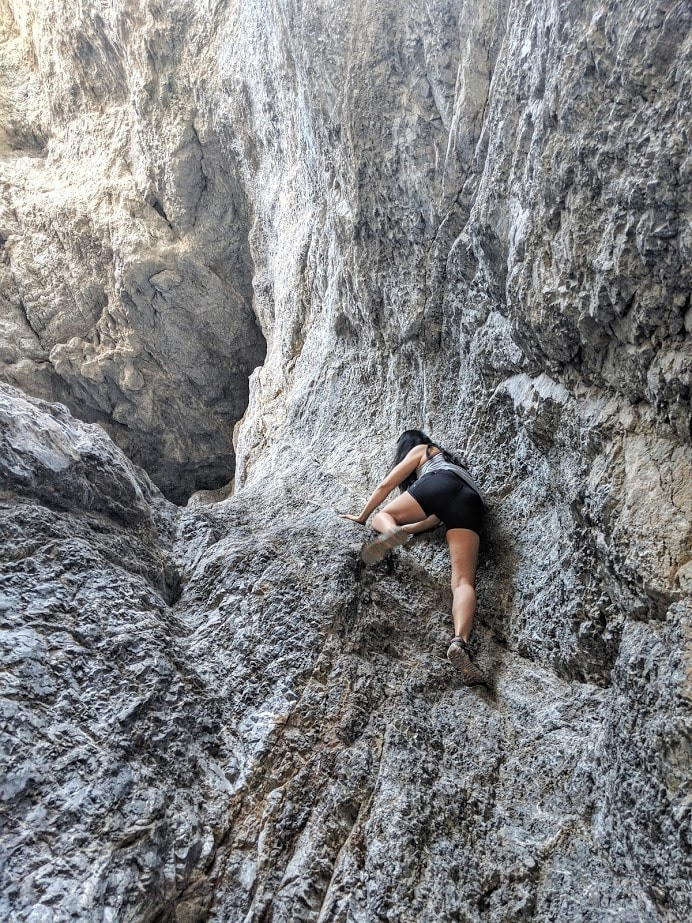
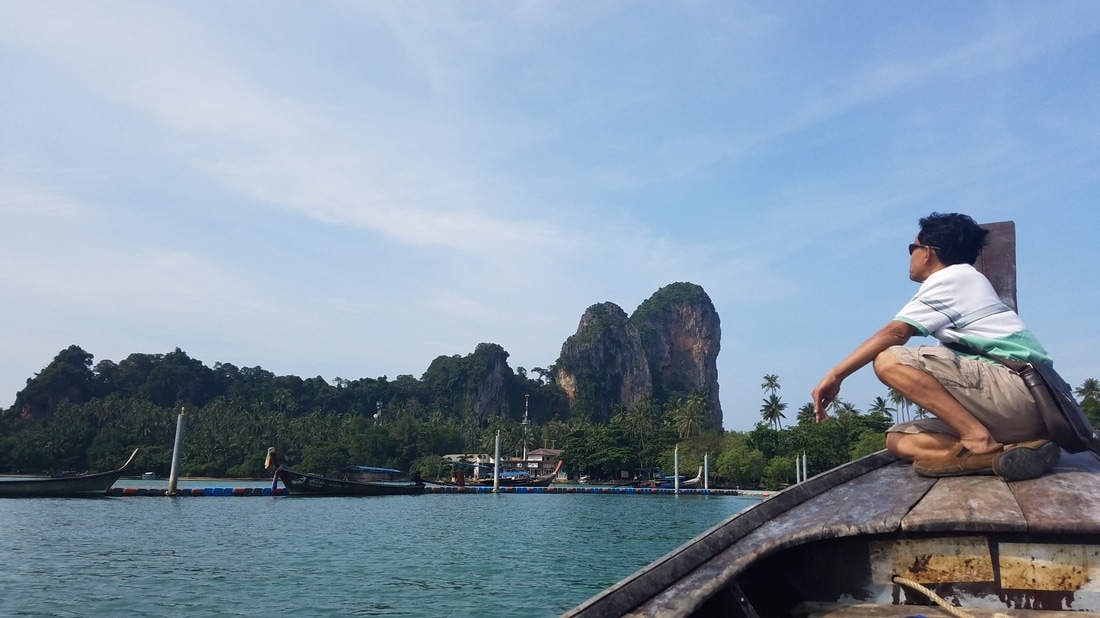
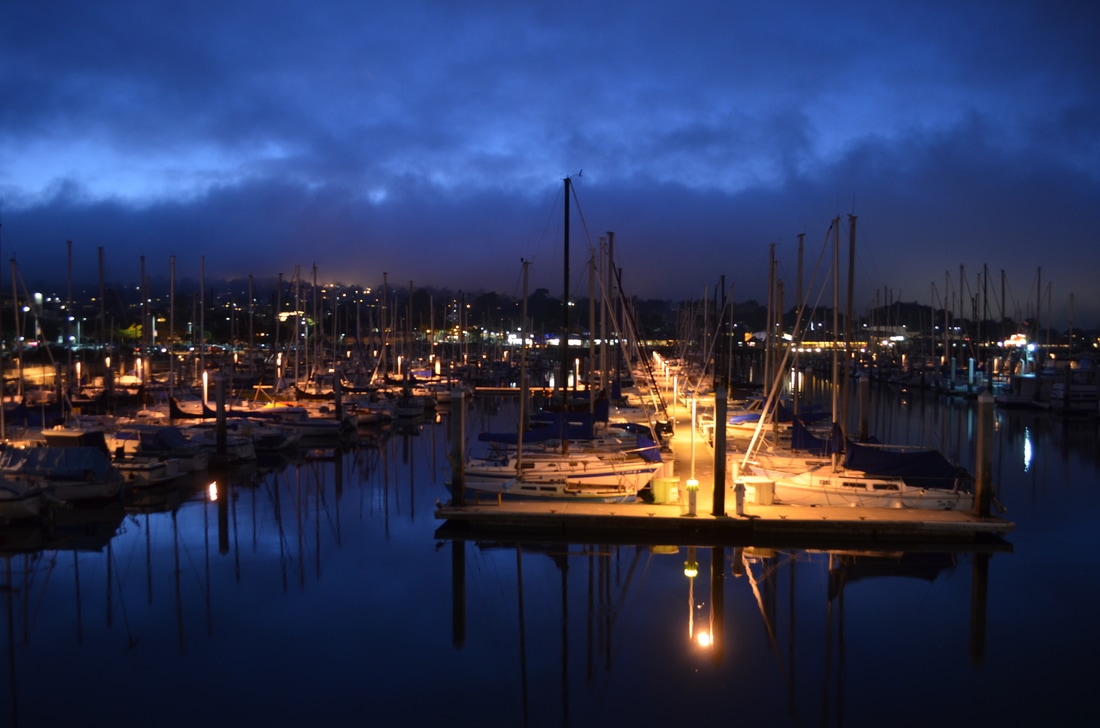
Blue Star and their amazing buttermilk donut (perfectly crisp outer texture and soft fluffy inside) is a must try if you haven't been. It's really special, I swear! But, really only the buttermilk donut - I like the original glaze, but if you have room for more, then the other glazes are fun to try, but it's really all about that perfect texture. The best part is that the lines aren't crazy like they are in Portland! www.bluestardonuts.com/ Salt & Straw has some fun flavors - but what I always go there for is their Strawberry Balsamic. I'd used to get sad when I'd try other flavors (even if I tried it as the second flavor) - because I'd always want more of that Strawberry Balsamic. The lines are just as crazy here as they are in Portland, which kinda makes sense to me seeing as it's warmer in LA. I'd wait in line for it down here or anywhere. They're finally opening a few shops in SF, so I'm pretty excited about it and likely less sad when trying more flavors with it more easily accessible! saltandstraw.com/ Unrelated to Portland love... Intelligentsia has great coffee, period. Those that know me, know that I need my coffee in the AM. The ambiance at this store is beautiful, too. Indoor/outdoor seating with beautiful artwork on the outside space and modern, minimalist decor inside. www.intelligentsiacoffee.com/ 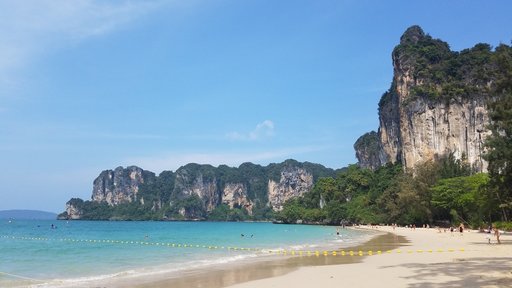 West Railay Beach early afternoon. West Railay Beach early afternoon. Railay Beach is beautiful and less packed than the other beaches in Southern Thailand. And, between Railay and Tonsai, there is world class climbing. I loved my stay there (lots of photos of it on my instagram and likely in future posts). But - I remember doing lots of searching on the interwebs on this particular stretch since there seemed to be a lot of options. 1) Take a bus - there are overnight buses that you can take. My back and knees are much too old for that in my 30s, so I nixed this. Plus, with the costs down there so much lower, double the price for flying was totally worthwhile (about 75 USD round trip). 2) There's not a train option. 3) Fly! Which is what the rest of this post will be about. But, it's not a direct flight like it is to spots like Phucket.
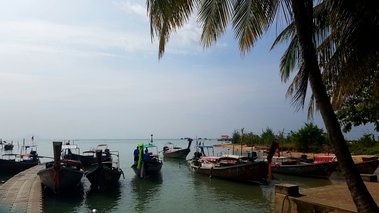 Ao Nam Mao Pier in the late morning. Ao Nam Mao Pier in the late morning. Railay Beach from Bangkok via Air A quick google search lets you know that AirAsia is the least expensive option - so I went with that (friends and the interwebs told me that this was totally safe and okay). AirAsia doesn't depart from BKK (the airport you likely flew into Bangkok if coming from the US), but from DMK which is about half an hour north of the city. You'll be flying from DMK to Krabi (KBV): 1) Uber super early in the morning from my airbnb - which is easier than hailing a cab from Sukhumvit where I was staying, at least at 4:30am. There's no direct train to DMK (Don Muang), so taxi or uber is the best way to go. It's about 350 baht. 2) Airport check in is organized by flight, not by airline. Also, not all cab drivers will know where domestic is and where international is (unlike in other cities). The usual airport security applies (no liquids, electronics need to be taken out, etc). 3) Typically (for AirAsia at least), there's a shuttle that takes you from the gate to the plane - when they're ready for boarding, they'll start having everyone pile into the shuttle. 4) Once you get to Krabi, grab your things and head toward the exit. It's a small airport, so not a lot of confusion there. The easiest next step is to get a taxi/car to one of two ports: Ao Nang or Ao Nam Mao. The tax costs about 700 baht from what I recall (about 20 USD, so be sure to have enough cash). There should be a taxi stand that is semi-established feeling that will grab you a car/taxi. Ao Nang boats will take you to West Railay beach where there is a WET landing. It's also the beachy side of the peninsula (it's not an island) where the bigger resorts are. So, be prepared with flip flops and such. Ao Nam Mao will take you to the East Railay pier. 5) It sounds like both piers function similarly - I went to Ao Nam Mao - and you get a ticket to enter a queue to wait for a long tail boat to fill up. I suggest you time your flight so that you're there during normal hours (not evening) so that it takes no longer than 30 minutes or so of waiting. They pretend like there are times that the boats leave, but my experience was similar to others - they just wait for it to fill up. This was inexpensive. The driver and boat sales person might ask you to purchase a return home - it'll be over priced. I suggest you get a return home "tour" from the tour stand in front of the Avatar Hotel on East Railay. It was about half the price quoted (good thing I emailed them ahead of time!). 6) The boat ride is wet or can be. And if it happens to rain, you could get even wetter. Not a bad idea to have one of those plastic rain thingies with you just in case! From the East Railay Pier, it was super easy to find my hotel, Avatar. Just walk north (or to the right when coming from the pier) - most other hotels are that direction as well.  Beach time at Pranang Cave Beach! Beach time at Pranang Cave Beach! The way back...
Is way easier! But, with a few quirks worth mentioning. Purchase a "tour" from the tour stand in front of Avatar Hotel (or from other tour stands, there are plenty all over the small Railay area). It'll include your long tail boat and car voucher. If leaving from the East, you find someone at the pier and show them your purchase and you'll get into your "tour group." Depending on time of day (low and high tide) you may enter Ao Nam Mao at a different pier than the one you left from (which is what happened to me). You show your car voucher to random cars and see if anyone takes that voucher - a bit odd since it's not like a particular car is tagged to you. It sounds like the "tour" just makes sure there are enough cars waiting for you at approximately the right time at the pier for pick up to the airport.
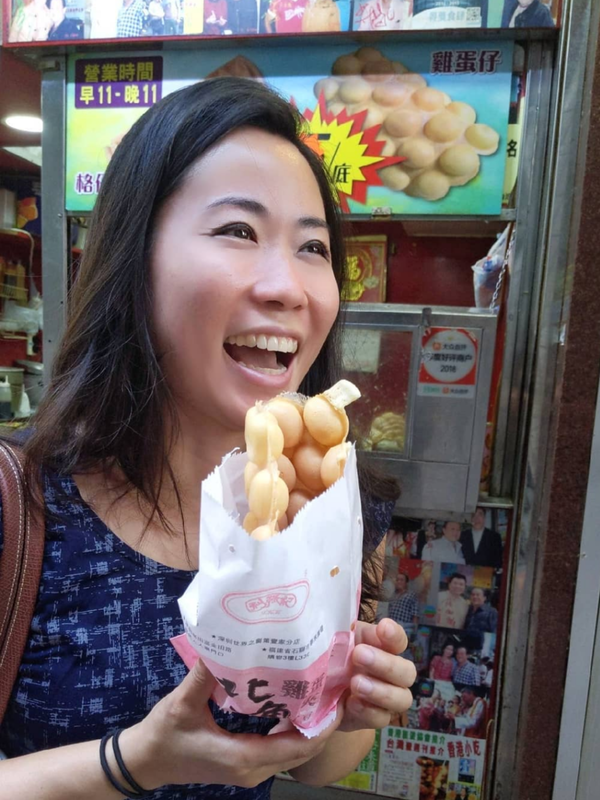
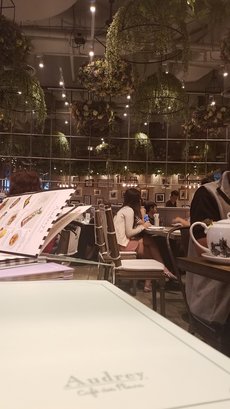
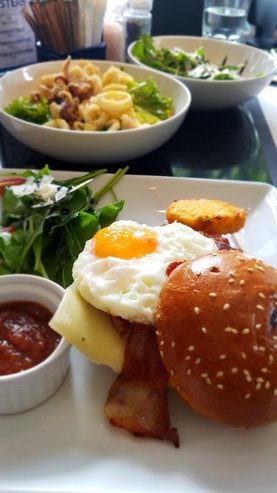
 French toast at Roast, another solid brunch spot in Emquartier. French toast at Roast, another solid brunch spot in Emquartier. Ok - obviously there are lots of great, upscale stores to explore. Also fun nooks and crannies including a section for Thai designers (which is also next to Greyhound - a very happening, local restaurant that's not near any other restaurants and worth checking out (get the sashimi salmon with spicy seafood sauce, they're known for it). There is also a hodgepodge shop that reminds me of Urban Outfitters - Another Story. Another Story has local artwork and lifestyle/home type items from around the world. Inside the store, there's an Issaya Patisserie (with unique Thai-esque flavored macarons - but they have a better location at Central Embassy). And there are several coffee shops worth exploring - my fave is Roast, they have fun drinks and delicious brunch. Jones the Grocer was another decent brunch spot close to the grocery store, Gourmet Market - where you can find most American/UK/Japanese items that you need. The area is incredibly international. Of course, there's the usual mall food cour that is quite good - but not quite as good as the one at Central Embassy.  Food stalls in front of the Gourmet Market (grocery store).
What to do before/after a trip to EmQuartier?So, if you're in Bangkok for vacation, you're likely on there a few days, a week if you're lucky. You could easily pair a morning/brunch trip to EmQuartier with...
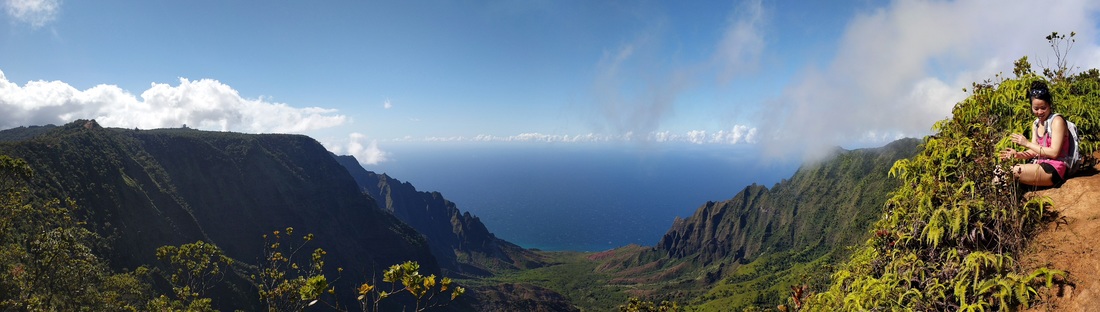
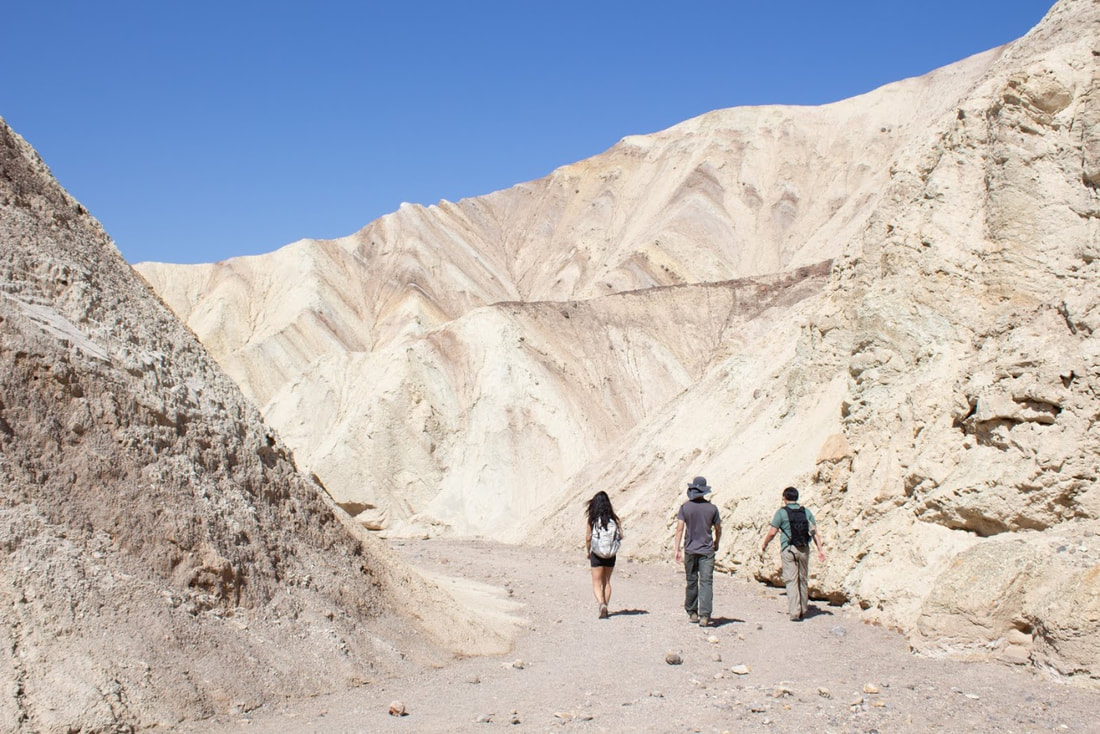
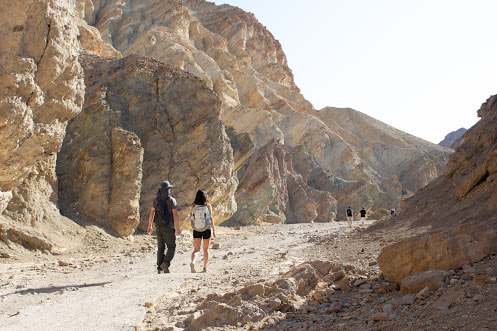
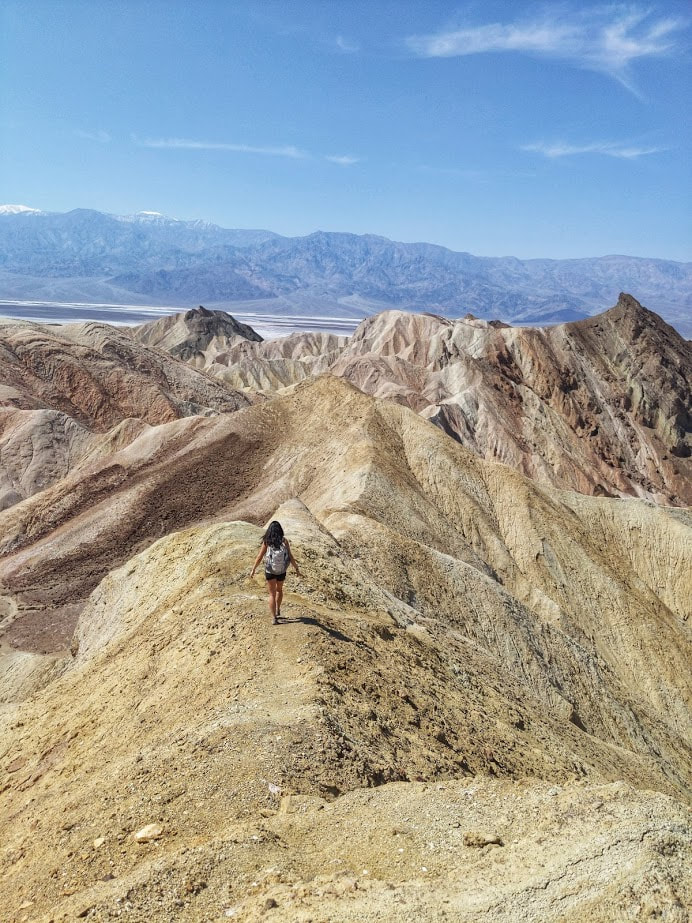
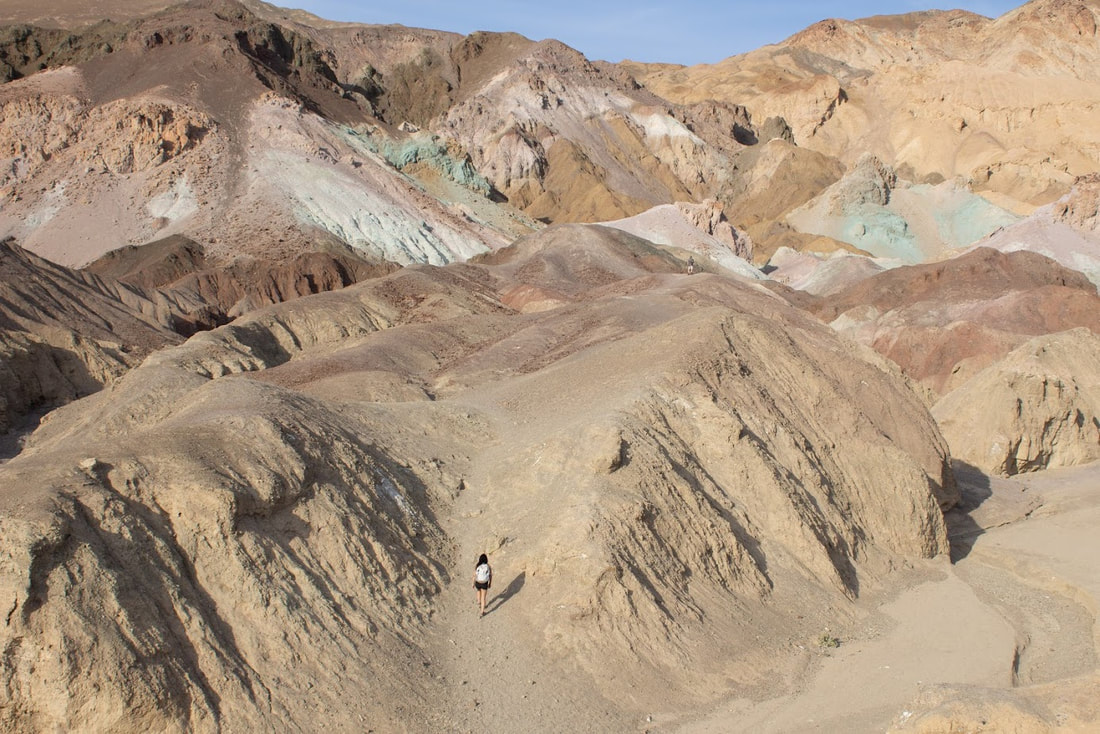
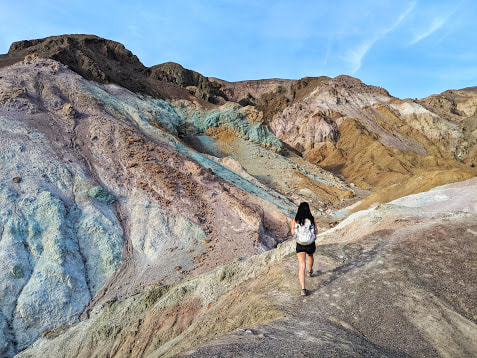
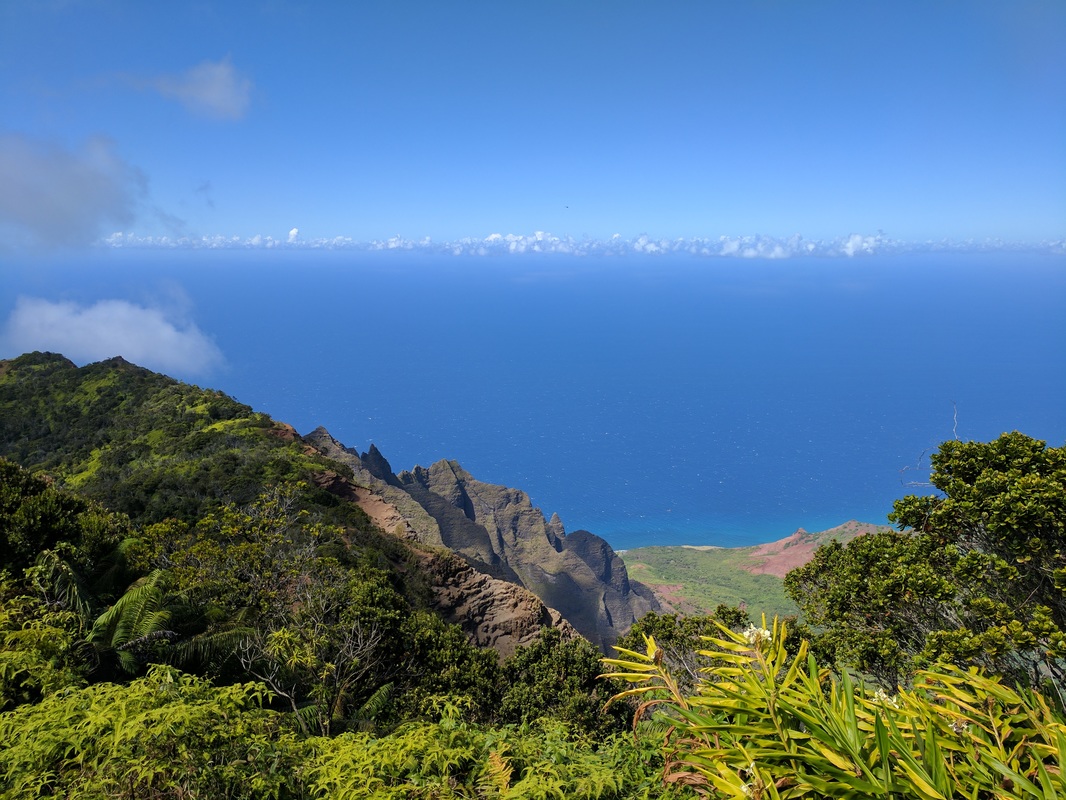
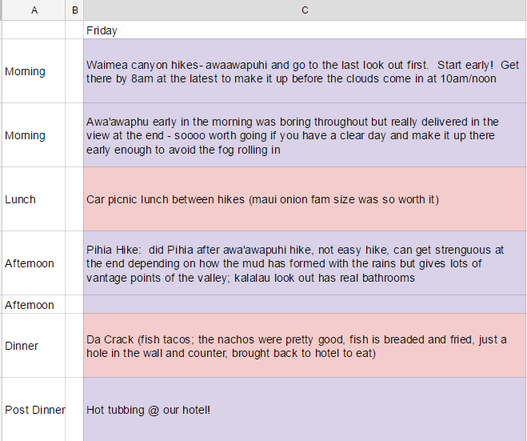
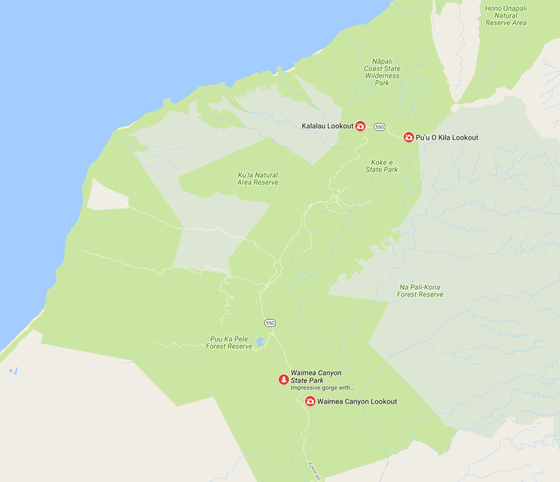 Click image to link to google maps image of this. Click image to link to google maps image of this. The Journey & Timing to Waimea Canyon area (west side of Kauai) We started our day super early since the general research said to get there before the fog starts to roll into any parts of the canyon - and the rumors were true (despite our awesome weather, that does happen on and off throughout the afternoon - just as we hiked out of the earlier hike, we saw clouds roll in behind us). Since we were staying in Poipu, so we estimated about an hour and left around 6:30am to get there by 7:30am, so that we could try and start our hike by 8am and finish up by noon (for lunch). The first part of the drive was pretty easy going. Lots of birds on the road early in the morning, so be careful, especially of the roads are slick from rain. But, as we started heading up the canyons, it got pretty windy with turns, so those that easily get car sick, beware! Because of this fog rolling in, we rushed all the way to the very last look out for the most iconic view - Pu'u O Kila Lookout. 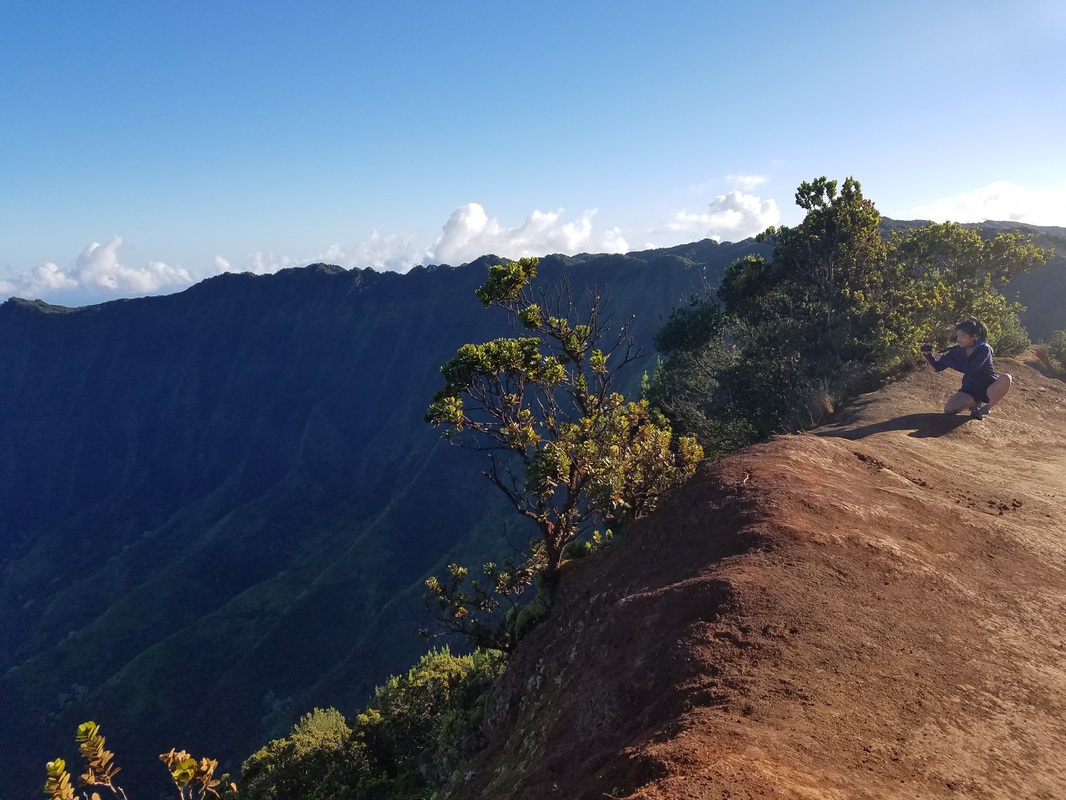  As you can see from the photo above, the weather was great, but the sun was just in the wrong spot and the real photographer on our trip (not I) said this wasn't worthy of a print. But, there was a lot of potential in the shot, so we decided we could come back afterward if we had time/energy. There are two areas to easily walk up to for photos at Pu'u O Kila Lookout, the fenced in section as you climb up from the parking lot a tiny bit, or this area in the photo above, which is just beyond. We found area more stunning. However, if it's wet, my guess is it'd be pretty dangerous feeling, those cliffs are for real. The Phia trail starts from here (see below for more on the trail). The Awa'awapuhi Trail This was my favorite hike of the week! It's true what they say, it's a bit boring on the way there and back; the gift is truly the destination. The full trail is about 3 miles out and 3 miles back. If it's dry, you can get all the way to the tip of one of those crazy looking ridges. I didn't realize it was a full 6 miles, so we ended the hike a bit later than we anticipated but it all worked out since we still finished the day up in the canyon area by 3/3:30pm. From Pu'u O Kila Lookout, we drove down to Kalalau Lookout (about a 2 minute drive) - and there's a bathroom there, yay! And another great view that we decided would be better later in the day since it was a similar view to the above. After our quick bathroom stop, we tried to look for the awa'awapuhi trail. Since we were so early, there was only one another car in the lot - making it hard to find so we drove past it a few times before seeing it. If you're coming from the top of the canyon (the two mentioned lookout points), the dirt parking lot will be on your right, about 5 minutes past Kalalau Lookout. If you see the camp grounds on your right, you've gone too far. 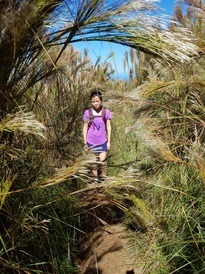 Generally easy hike on the way out since it's mostly down hill (the first part is a bit uphill). It's not a straight up trail most of the way, so "easy" as in you're not using your hands. Not a leisurely walk on a flattened out trail. There were narrow areas that poked your legs and hit your face (they likely cut it back in Spring before tourist season in the summer and it grew out by the time we got there in the fall season). Most of it was covered, so that was nice. But, it was super boring unless you like to see lots of jungle for long periods of time. The last mile perked me up a bit. There were these beautiful, tiny flower clusters when we went. And this overgrown, softer hay-like section right before the clearing for the incredible view. 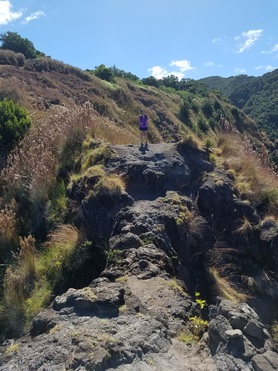 Once you get to the clearing, you can head down to the ridge if it's dry - be careful! We were daring and went all the way to the tip, but DO NOT GO unless you feel super confident about it and it's totally dry. Wrong footing anywhere and it could mean going down one of those steep cliffs, eeeeek. The two sides of that pathway shoot straight down to the bottom of the canyon, and it leads to the second plateau and a great spot for some epic photos! It's a special spot - you can tell since lots of boats and helicopters pass by. The helicopters actually fly in a bit lower than the trail's vantage point! We met a couple that went out to another look out point for their hike and they got this awesome photo of us on this second plateau (see in the gallery below). I decided to head all the way to the tip of the ridge after seeing the couple do so and it was incredible - but really scary, and really shouldn't be done without understanding the risk. It got pretty narrow, about two shoulder lengths wide. Not too bad, but risky when the the ends of the path just jut down. The hike back was grueling, and even more boring than on the way down since it's still not scenic and it's all up hill. Pace yourselves correctly and take water breaks. We both decided the hike was worth it, especially since the weather worked out for us. But, that we wouldn't likely do the hike again since we've gotten to experience the vista point now and the hike there and back wasn't that special. The Kalalau Lookout We did another bathroom stop here and decided to take photos as we ate some of our family sized Maui onion chips, nom. Our first stops at the lookout points were early and totally empty! It got crowded later in the day. We were pretty tired after Awa'awapuhi trail and were deciding between Canyon trail to the iconic waterfall (see photo from look out point below) or going back up to Pihia trail (2 miles shorter, but I don't think is actually easier because of the muddy conditions we hit). Here are a few photos from the gorgeous Kalalau Lookout point break that we took (below).
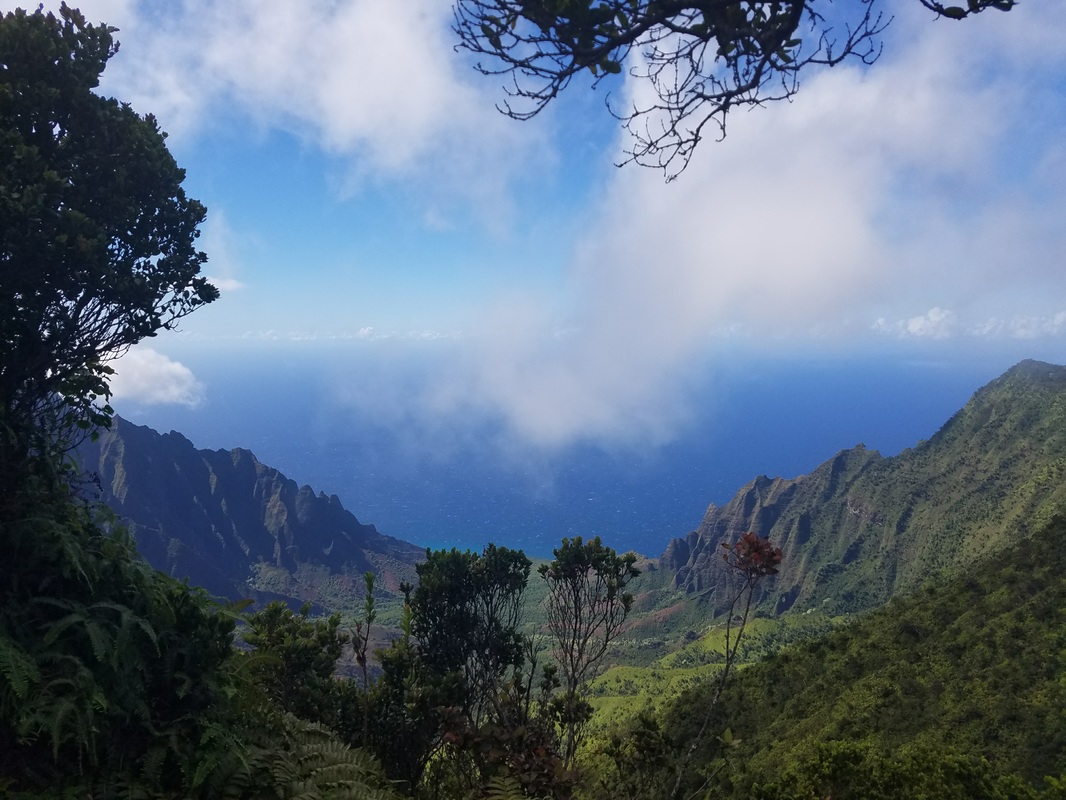
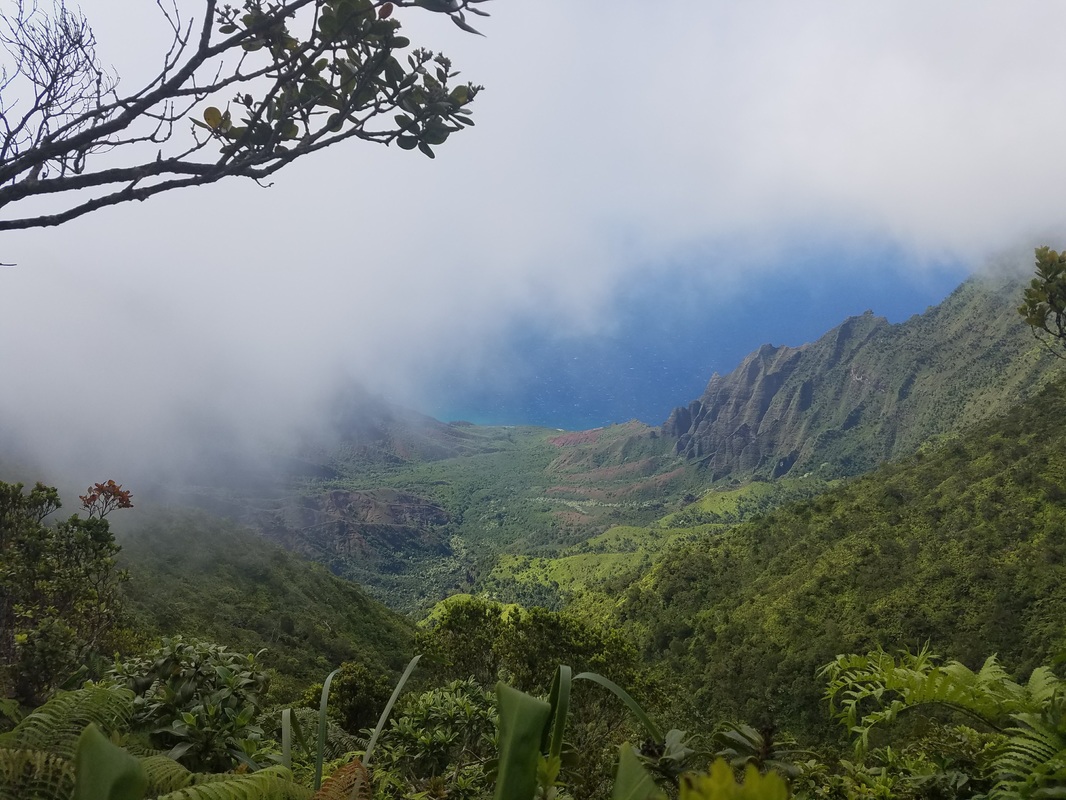
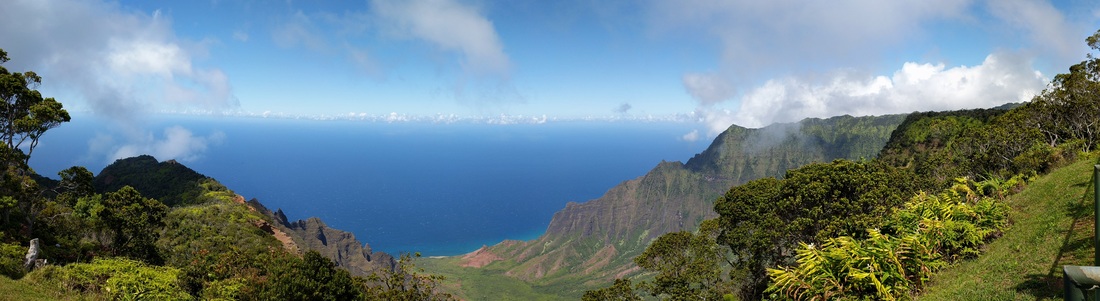 Pano of Kalalau valley. 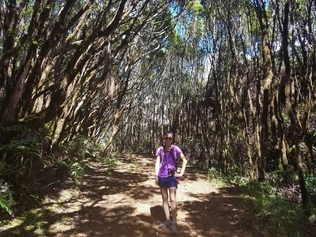 The Pihia Trail We headed back up to the Pu'u O Kila Lookout for more photos and decided to do the Phia trail since we didn't think we could handle anything more than that. We were thinking that this would be a quick and easy out and back (2 miles total). But, it wasn't! Because of how the mud was drying on the trail, it deceivingly looked easy from the start, but we were doing some serious scrambling (full on use of hands) and trudging through mud. It was pretty dry at the start and we went further, it became more covered, read: wet! There were platforms built up in the worst places, but because we did get rain the week prior, there were areas of the trail in deep mud. Likely because of the rain we got, there were also what looked like mud slides toward the end of the trail where we were climbing with our hands up chunks of mud/trail, as high as our hips! The view changes little on the way down, but the framing was totally different in certain spots and could feel quite different. It's definitely worth it to go at least partway down the trail. Toward the start of the trail you can see both sides of the ridge, inland and the ocean views. The fog rolled in and out as we were hiking and that was pretty stunning to see real time and happening so quickly.  Pano of the start of the Pihia trail.
 Pano on our way back that accidentally got me in the photo.  Waimea Canyon stops After 8 miles of hiking, we were tired! And we would come to realize, super sore for the next few days. So, we stopped by Waimea Canyon lookout for the iconic "Grand Canyon"-esque view and then realized we couldn't see the waterfall from there, so stopped once more (on the side of the road a bit further down the road) before heading home. It was around 3pm when we finished everything up for the day and we really wanted shave ice - Poipu/Koloa doesn't have one that's well rated so we went to Jojo's in Waimea town. Perfect end to a great day in the west side of Kauai. 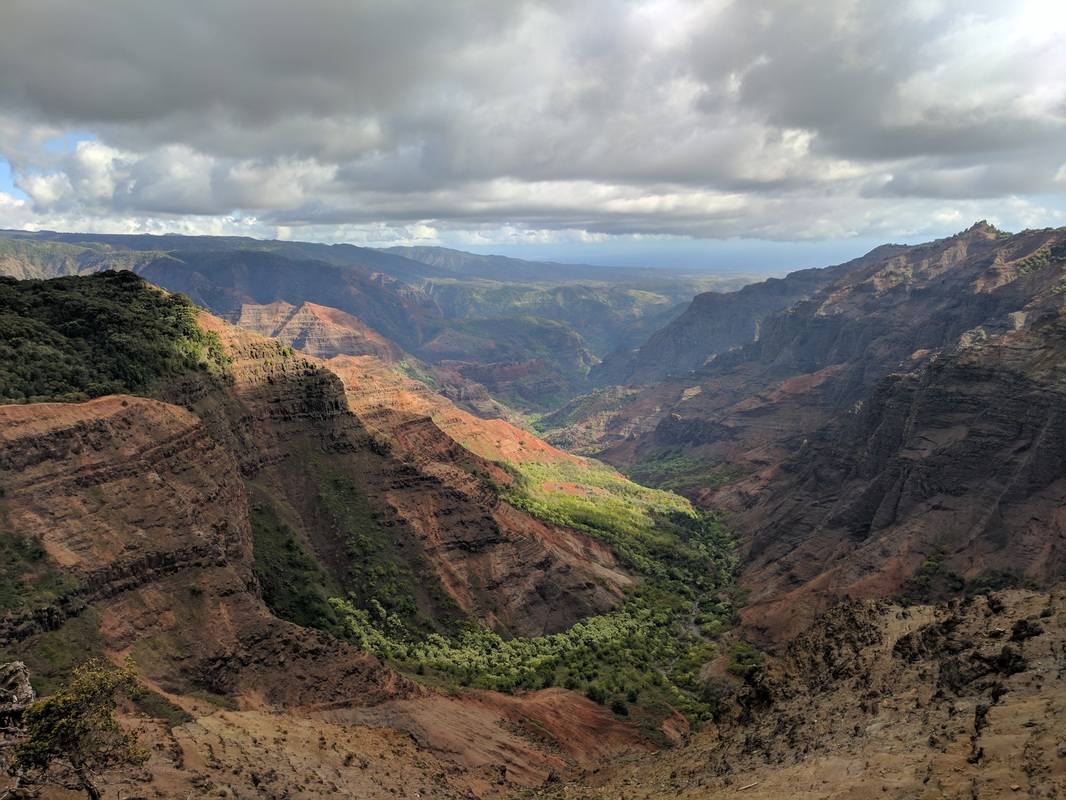 View from the lookout point. 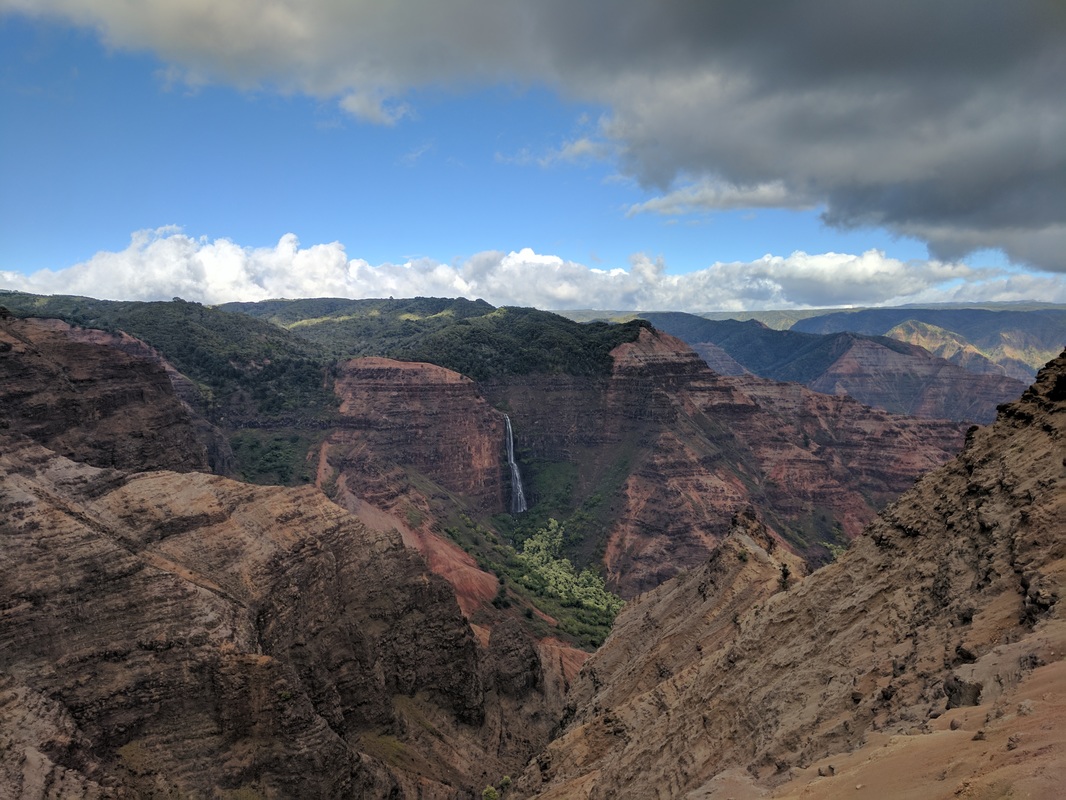 View just past the lookout point on the way back down.
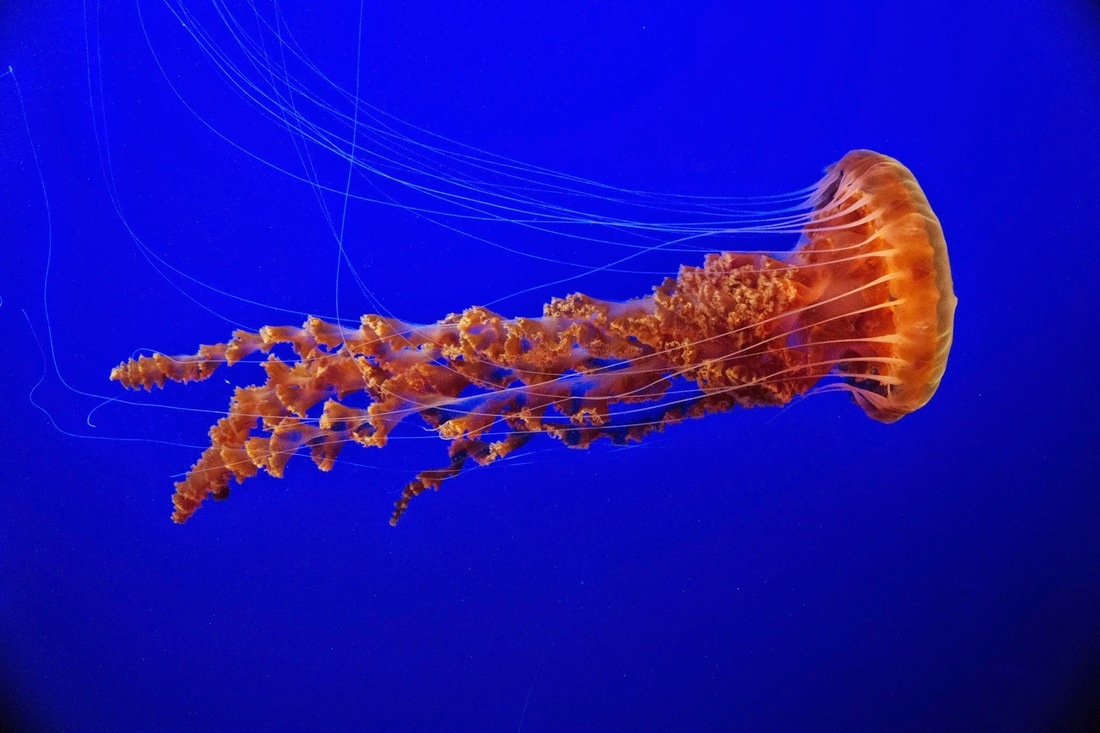
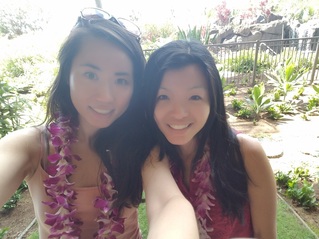 Photo at Koloa Landing, fresh leis at check in :) Photo at Koloa Landing, fresh leis at check in :) Fall is low season for the islands of Hawaii. I thought that it was also the ideal seasonal time to go to Kauai, just like it is for the other islands. But, turns out the winds are a bit high on the Napali coast starting around this time of year that there are risks of your boat trips not making it out to the iconic coastline. So, I suggest going just a bit earlier - but luckily we got some amazing weather! Unlike the other islands, this was my first time in Kauai. I had this silly idea that it was more of a romantic spot and was waiting to go with a significant other. But, turns out one of my female besties was up for the trip, over my bday weekend, no less! I am loved. I've got to say I'm glad I went - it's now my second favorite island and it's definitely the most lush and beautiful island. Reminded me a bit of Costa Rica's rainforests and the view of the Napali coast from the water - stunning. The Resort Ok, the important stuff. Because neither us have been, we decided to hit the biggest, most popular sections of the island. Because of this, we stayed at the amazing Koloa Landing Resort - lucky to stay in the nearly brand new rooms and upgraded to the 1 bedroom suite with the hot tub right in our backyard! https://koloalandingresort.com/ We're also super Chinese - great value for a 4 star. It's in south shore and about 45 minutes to Waimea Canyon and about 1 hour 15 minutes to the Hanalei (near the Kalalau trail). We really liked this set up, but next time would likely split the trip and find a place to stay on the north side to really explore the trails and sights up there. ...more updates on the resort in its own post coming soon. The Overview Here's the spreadsheet:  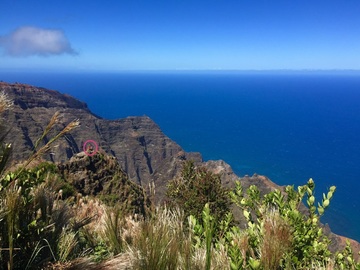 My fave hike, Awa'awapuhi on the Waimea Canyon area. My fave hike, Awa'awapuhi on the Waimea Canyon area. The Hikes On recommendation from lots of people, we focused on hikes. Day 2 we went with Waimea Canyon area and Day 4 was up in north shore for the Kalalau trail. Waimea Canyon: Awa'awaphu Trail & Pihia Trail North Shore: Kalalau Trail (first 2 miles) South Shore: Coffee Plantation (ok, not really a hike, but we walked around!) Click for Pihia Trail & Awa'awaphi Trail overviews as part of the Waimea Canyon (west side) day trip. The Boat Excursion I got a lot of recommendations to see the vastness of the Napali coast either via helicopter or by boat. We with the boat option and since we were staying in Poipu (south island) we went with Captain Andy's which is at Port Allen, only about a half an hour drive from our hotel. ...updates coming on Captain Andy's in another post soon! 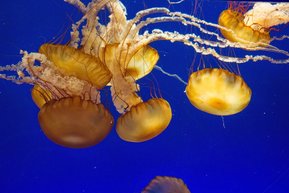 The jelly fish exhibit is amazing at the Monterey Bay Aquarium. The jelly fish exhibit is amazing at the Monterey Bay Aquarium. Just over 2.5 hours away (depending on traffic), Monterey Bay makes for a great day trip. I'm in love with the ocean, so, I'm down in that area quite a bit. There are quite a few things to do in that area:
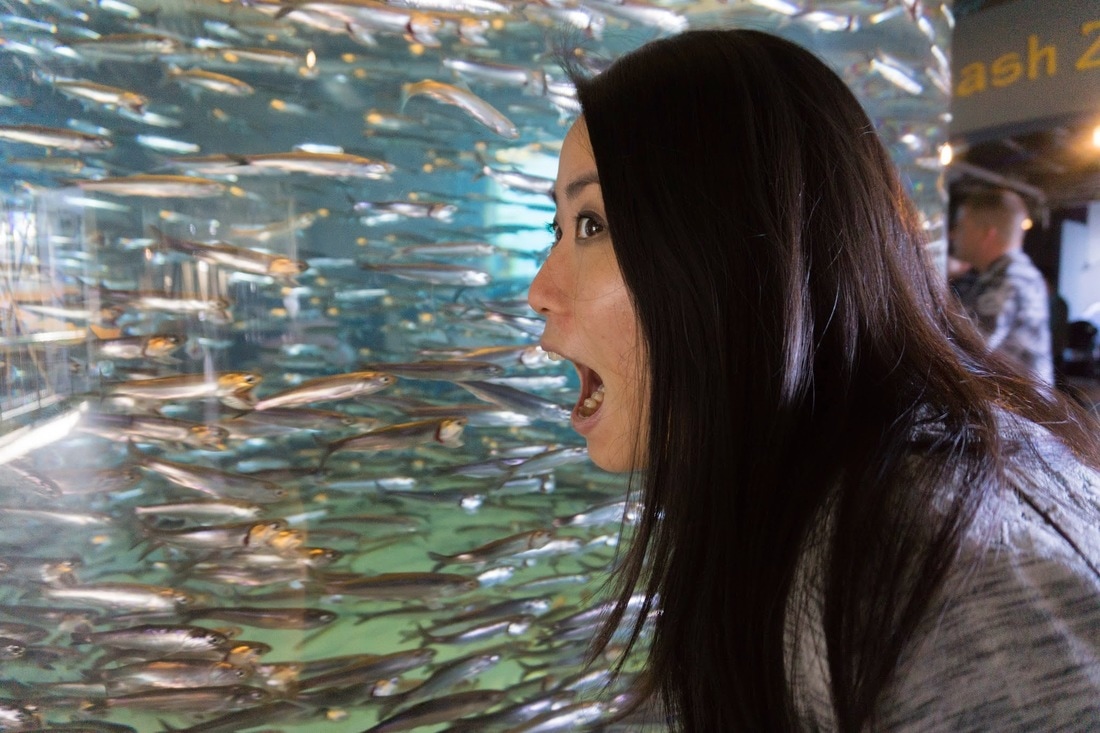
 In a penguin egg shell! Lots of hands on exhibits in this section that are fun (like getting in a shell or learning to communicate like a penguin). In a penguin egg shell! Lots of hands on exhibits in this section that are fun (like getting in a shell or learning to communicate like a penguin). Monterey Bay Aquarium If you've never been, it's a full day's worth of fun. Slowly meander through the entire museum's vast grounds, spend time outside the back entrance taking in the sights and smells of the ocean, and grab dinner at one of the amazing seafood spots in the area afterward. Some of my favorite spots that you might want to linger around a bit longer:
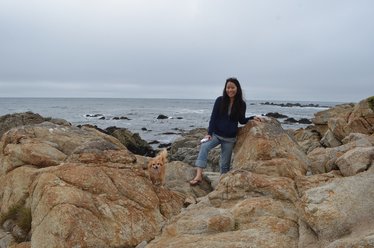 Climbing the rocks along the 17 mile drive with my pup, Cleo Climbing the rocks along the 17 mile drive with my pup, Cleo 17 mile drive I love taking friends and family here when they visit - especially those that have seen the major sights in the SF Bay Area already. It's stunning even in the gloom. This is one of the most beautiful spots to enjoy the rocky, Northern California shoreline. Second only to my fave beach, Montara Beach (closer to SF). Here are a few tips:
|
AuthorQuit my non-profit career in a fit of YOLO rage. Blessed enough to go from wanderlust to wanderslut. Collecting cities & countries, not men. 
On instagram:
GlobalWanderSlut (for bite sized, most up-to-date travel tips from my adventures)
Archives
May 2020
Categories
All
|


 RSS Feed